ActiveRevenue integration in CPV Lab | CPV One
CPV Lab and CPV One have direct server to server integrations with Active Revenue ad network. By using tracking macros and Postback URL to get data from Active Revenue, your CPV tracker will show accurate performance metrics, all in one dashboard.
Who is ActiveRevenue?
- ActiveRevenue (opens new window) ActiveRevenue is a self-service platform that allows advertisers to access high performing ad units, granular targeting, competitive pricing, and multiple optimizations capabilities.
- Here is everything you need for both experienced affiliates and those who have just started to master affiliate marketing.
Step 1: You need a ActiveRevenue account
- If you don't have a ActiveRevenue account yet, then you need to register here (opens new window)!
- For CPV Lab and CPV One users, they have a special bonus that you can find inside your tracker under the Bonuses section!
Step 2: Setup ActiveRevenue in CPV Lab Pro
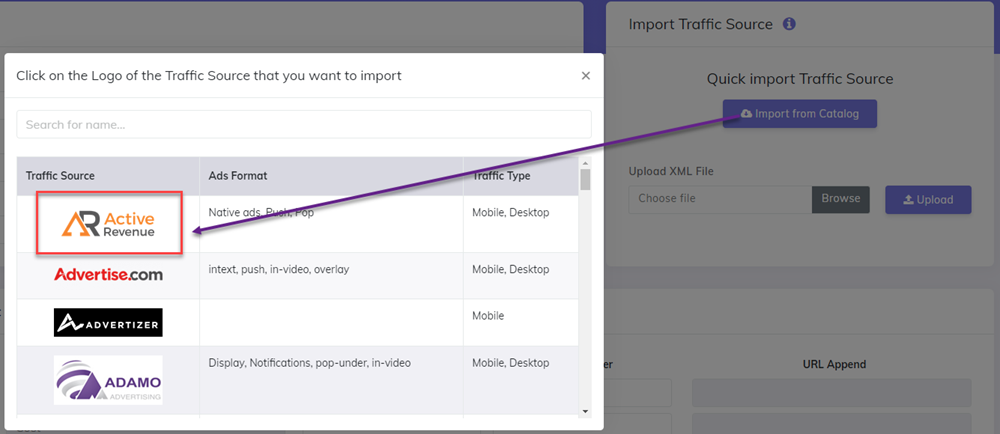
- CPV Lab Pro (opens new window) comes with the ActiveRevenue Traffic Source pre-configured in the Traffic Sources Catalog pages, so in this case all you have to do is import it from the Catalog.
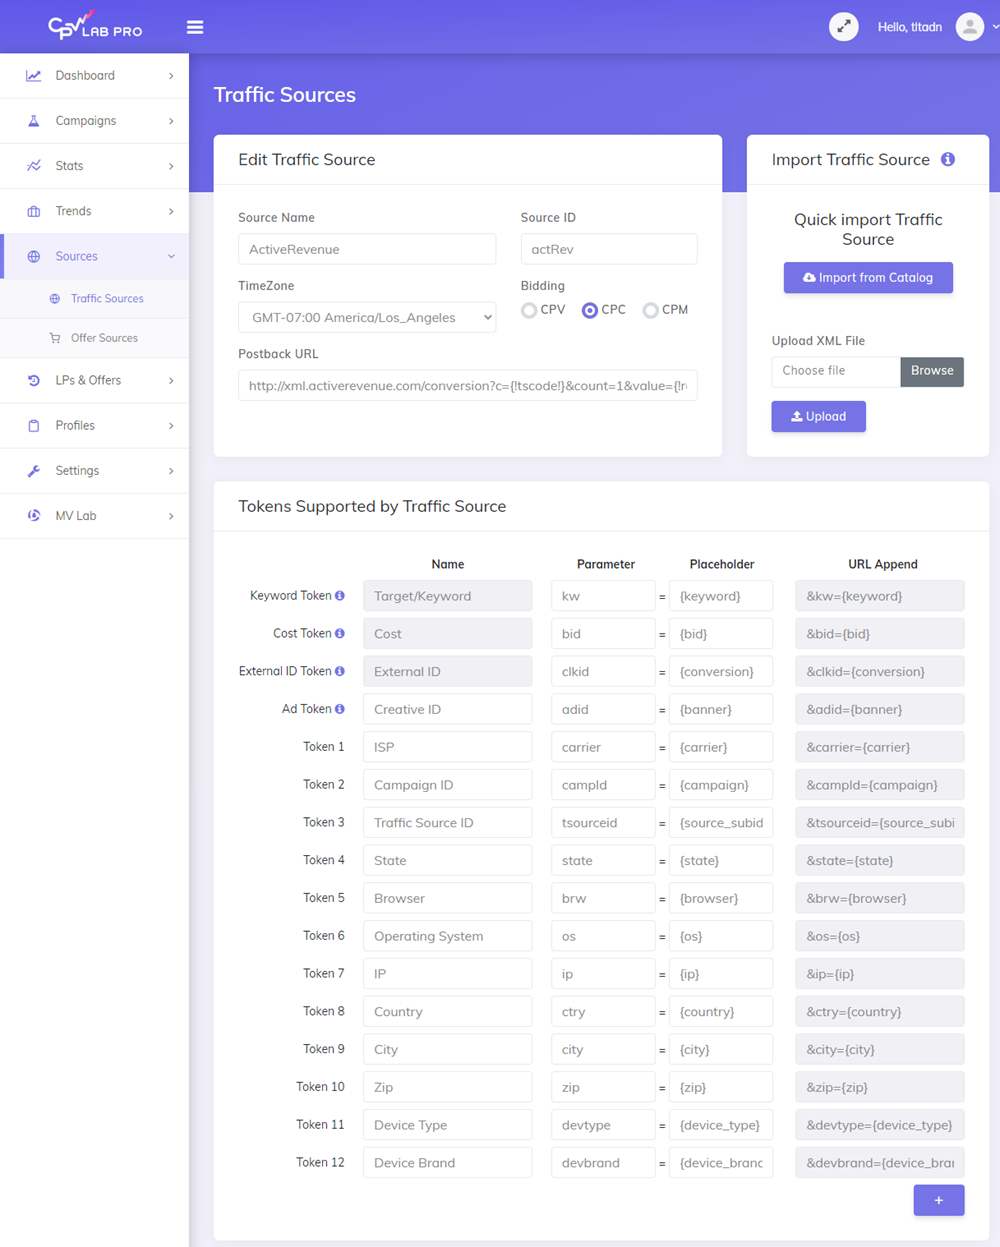
- The detailed configuration for the ActiveRevenue Traffic Source is the following:
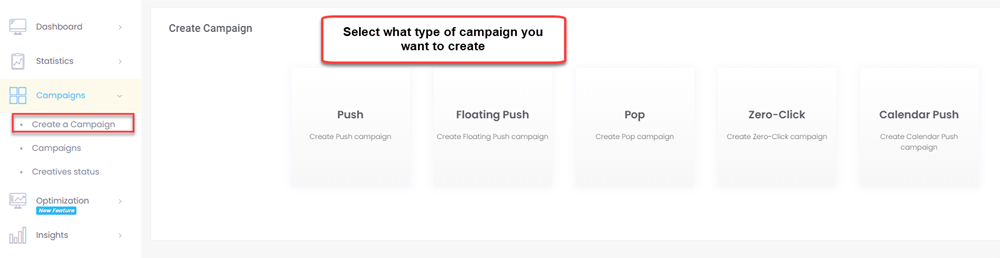
Step 3: Create a Campaign in CPV Lab | CPV One
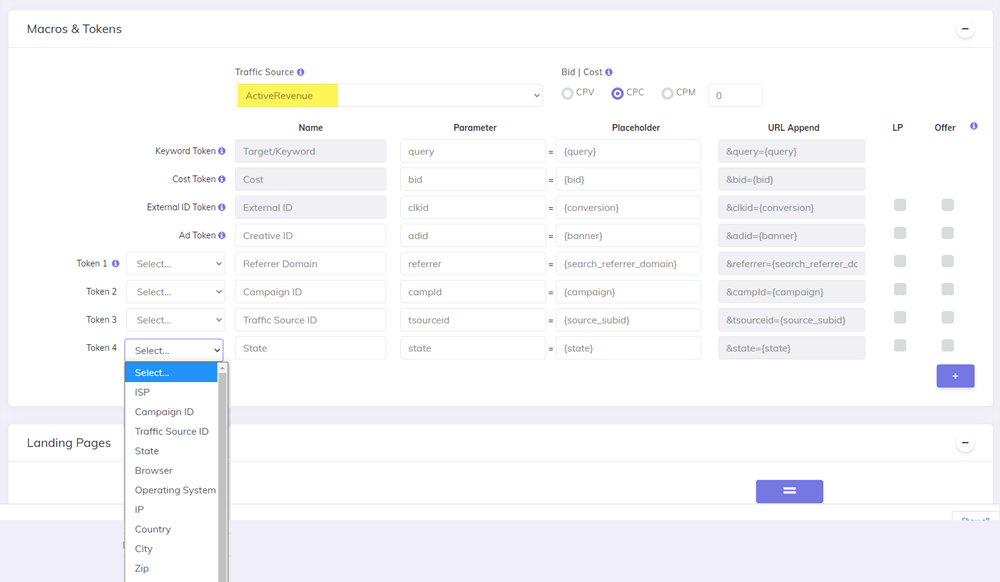
- In your CPV Lab Pro campaign setup page select ActiveRevenue as the Traffic Source and choose the Predefined Extra Tokens that you want to capture.
- Save the campaign
Step 4 (optional): Setup the Postback URL
- In order to track conversions into the ActiveRevenue platform, you need to setup the Postback URL from ActiveRevenue as the Traffic Source Postback URL in the Campaign setup page from CPV Lab Pro.
- The Postback URL should contain the CPV Lab Pro macro
{!tscode!}(for Unique Click ID). - The Traffic Source Postback URL will be automatically filled for the selected Traffic Source in the Campaign Setup page, but you need to select/check it order to have it used (check image below).
![]()
- If the Postback URL is not available (it was not setup or was deleted for this Traffic Source) then you can enter the following Postback URL as Traffic Source Postback URL in the Campaign Setup page from CPV Lab Pro:
http://xml.activerevenue.com/conversion?c={!tscode!}&count=1&value={!revenue!}
Step 5: Create the campaign in ActiveRevenue
Login to your ActiveRevenue account
Click on "Campaigns" -> "Create a Campaign" from the left menu
Complete the fields required for the campaign
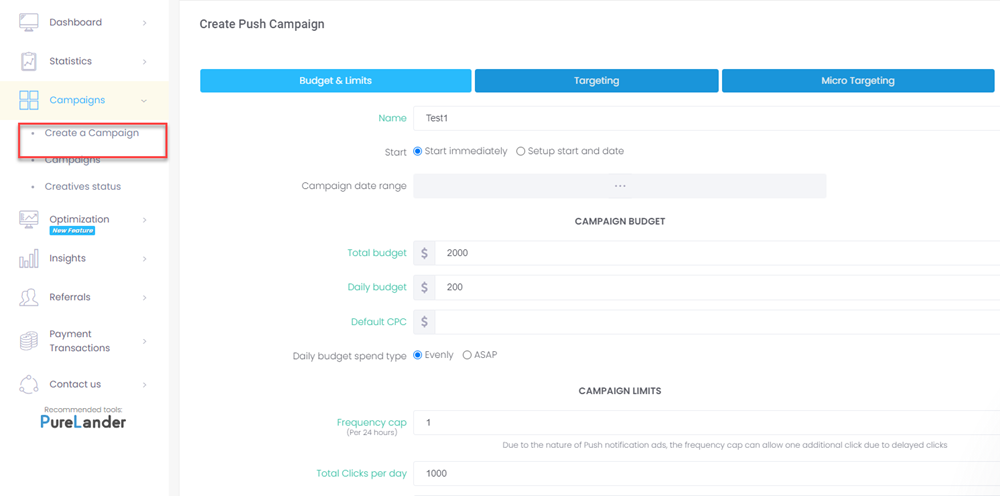
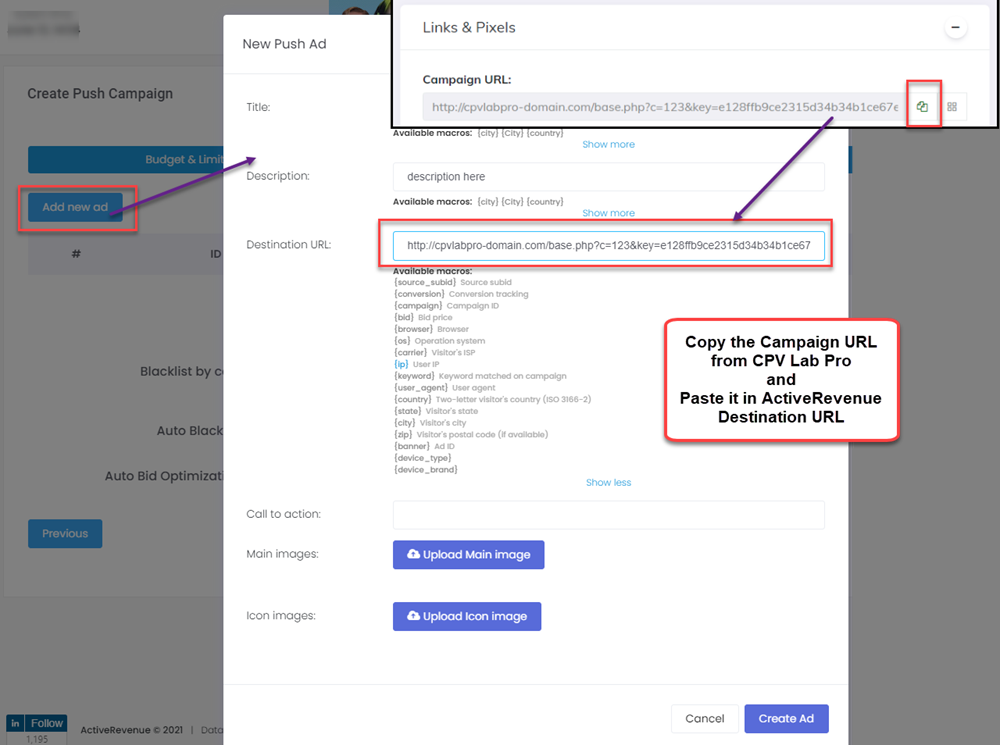
On the "Micro Targeting" step you can add a new Ad.
In the Destination URL field from the "Add new ad" form, paste the Campaign URL from CPV Lab Pro.
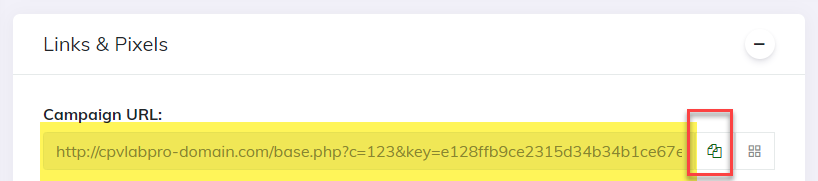
- The Campaign URL (provided in the Links & Pixels section from your Campaign Setup page) has all the parameters you selected as Macros
- Setup all the other properties for your campaign in ActiveRevenue and launch it!