Adsterra integration in CPV Lab | CPV One
This is a step by step guide showing how to:
- setup and track an Adsterra campaign in CPV Lab or CPV One ad tracker
- setup an Adsterra campaign in Adsterra
- setup the Postback URL tracking to have CPV Lab and Adsterra connected
Who is Adsterra?
Adsterra (opens new window) is a traffic source providing quality direct traffic from around the world.
It comes with:
1,000,000,000 impressions daily, 248 countries, 20+ targeting options, up to 15 creatives for each A/B test and 8 years on the market
Fully customizable Social Bar format — shape it into anything you want and get 10-30 higher СTR than Web Push. Working on all OS and browsers
A variety of classic ad formats. Popunder, Push Ads, Native Ads, Banner Ads, Social Bar, Direct Link and VAST video
If you don't have a Adsterra account yet, then you need to register here (opens new window)!
Step 1: Setup Adsterra in CPV Lab
- CPV Lab Pro comes with the Adsterra Traffic Source pre-configured in the Traffic Sources Catalog pages, so in this case all you have to do is import it from the Catalog.
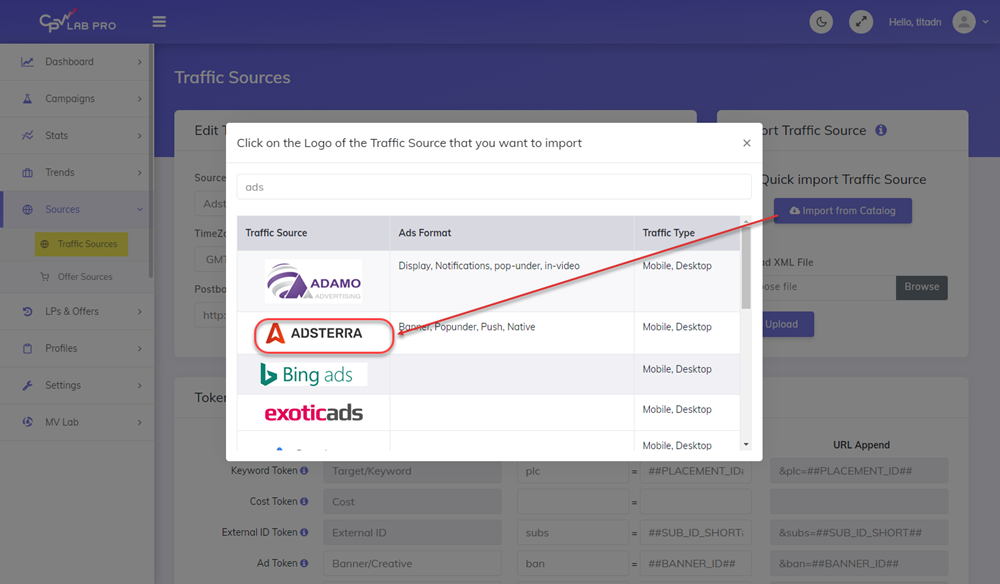
- The detailed configuration for the Adsterra Traffic Source is the following:
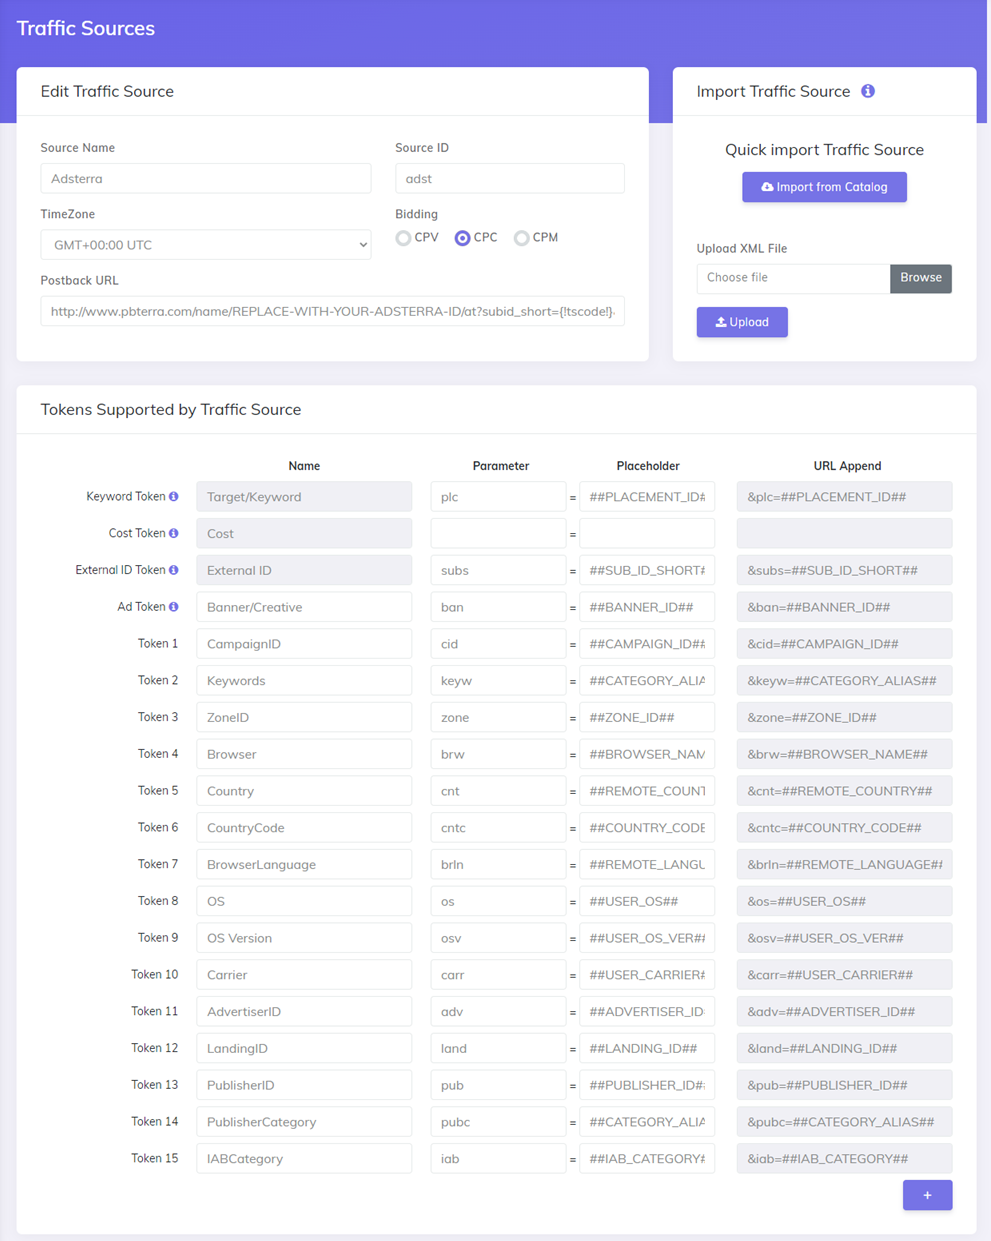
Once you import the traffic source from the catalog, it will show up when you create your campaign on the Campaign setup page.
To be able to keep your tracker and your Traffic Source reports in sync, you need to send data back to your traffic source. For that you have to have the Postback URL field setup correctly.
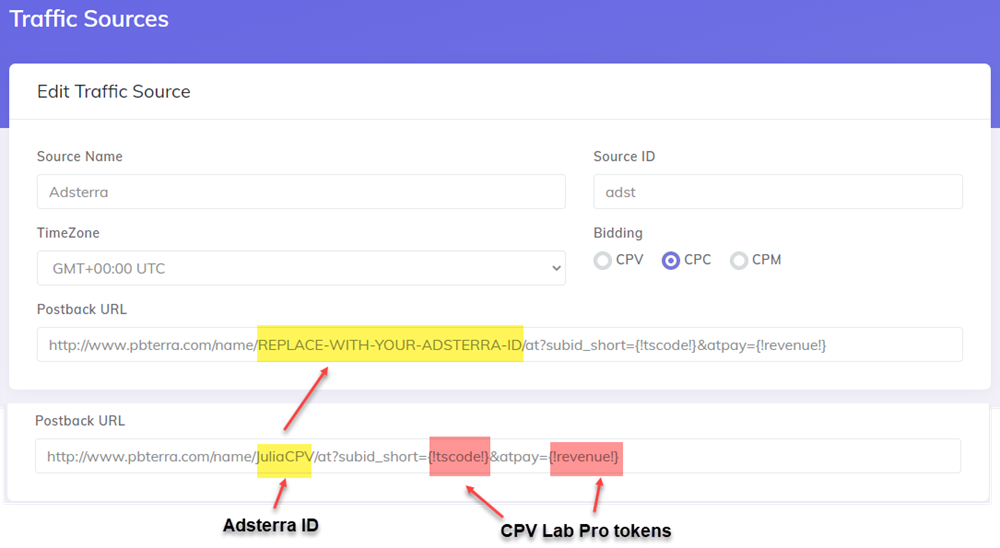
So, update the PostbackURL field with your Unique information from your Adsterra account (check images below for more details).
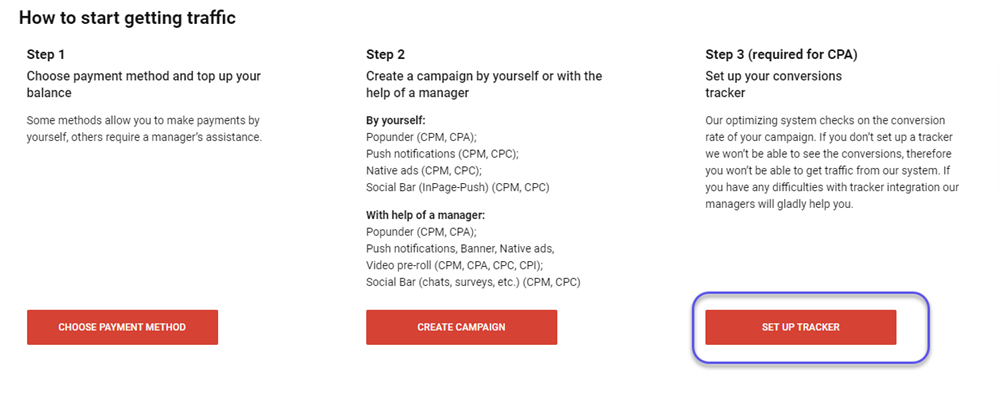
- first go to your Adsterra account and click on the "Set up Tracker" button
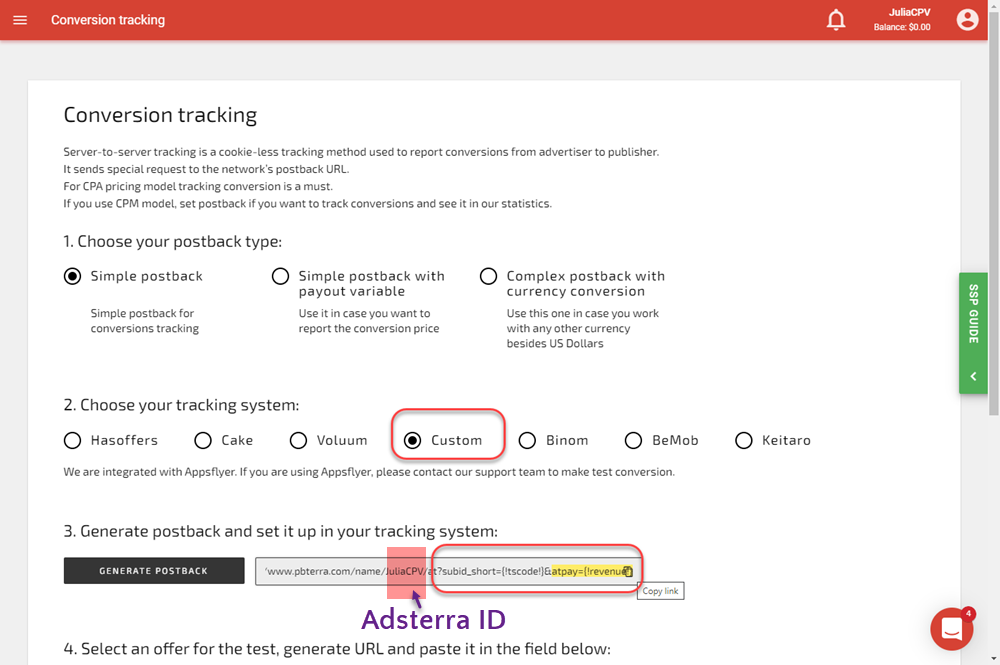
- then go in CPV Lab Pro -> Sources -> Traffic Sources and update the Postback URL for Adsterra traffic source so it will contain your unique identifier (in the image below is an example).
- just update the part where it says REPLACE-WITH-YOUR-ADSTERRA-ID with your actual ADSTERRA ID
Once you have the Traffic Source setup you can start creating your campaign
Step 2: Create a Campaign in CPV Lab Pro
- In your CPV Lab Pro campaign setup page select Adsterra as the Traffic Source and choose the Predefined Extra Tokens that you want to capture.
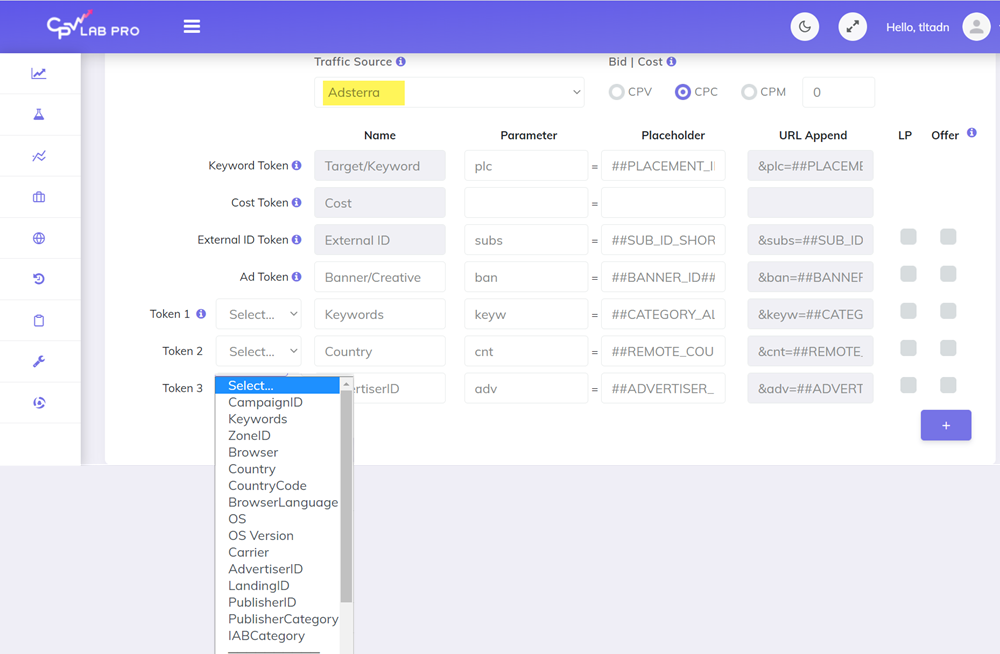
- Complete the other fields
- Save the campaign
- Optional: check the Traffic Source Postback URL - check the step 5 below for details
Step 3: Create the campaign in Adsterra
- Login to your Adsterra account
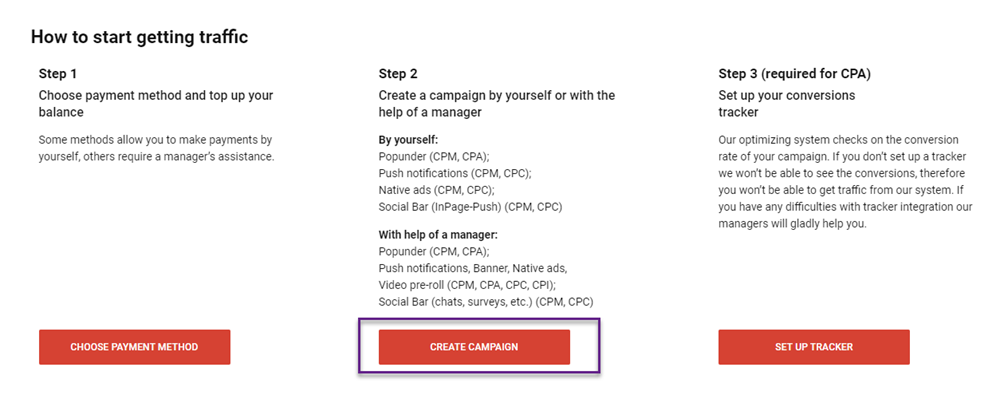
- Create a new campaign by clicking the "Create Campaign" button (from STEP 2 section or from the top left menu).
- Complete all the fields until you get to "Landing URL".
- Copy the Campaign URL from your campaign in CPV Lab Pro (step 2 above) and paste it as a Landing URL in Adsterra.
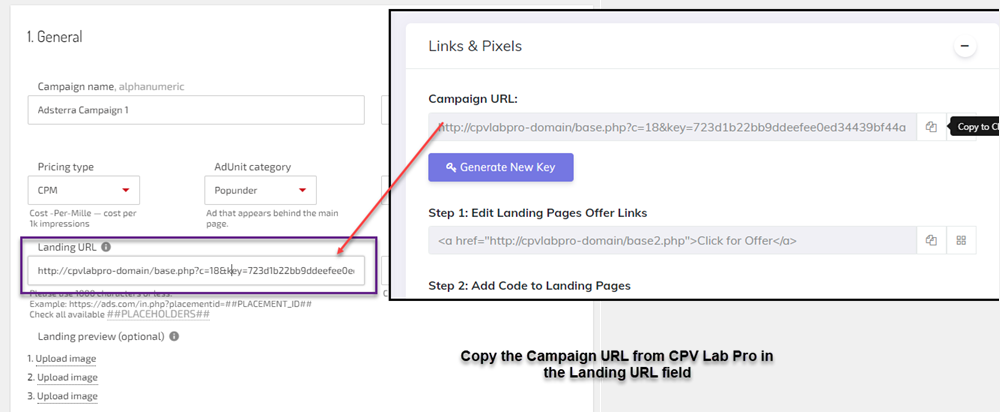
- Finish the campaign by filling all the other fields and clicking "Submit".
Step 4: Start the campaign in Adsterra
- In Adsterra platform, by default, after it is created, the campaign is sent to verification. Wait until you get the ok to start the campaign
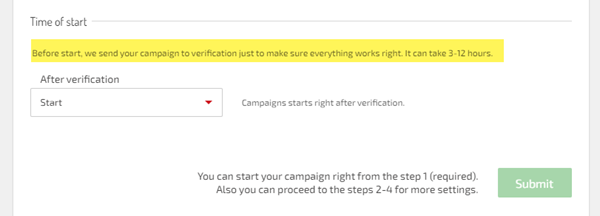
- Start your campaign and follow the results in CPV Lab Pro!
Step 5 (optional): Setup the Postback URL
- In order to track conversions back into the Adsterra platform, you need to CHECK the Traffic Source Postback URL in your tracker.
- The Postback URL should contain the CPV Lab Pro macro
{!tscode!}(for Unique Click ID). - The Traffic Source Postback URL will be automatically filled for the selected Traffic Source in the Campaign setup page, but you need to select/check it in order to have it used (check image below).
- It is located in the "Tracking Pixel" section from your campaign page.
- Make sure it has your Adsterra ID (check step 1 above for details)!
- The Postback URL should contain the CPV Lab Pro macro
![]()
- The postback URL is in the following format: