Advertizer.com integration in CPV Lab Pro
Below you will find a step by step guide on how you can configure everything in CPV Lab Pro (opens new window) by using Advertizer.com (opens new window) as a Traffic Source.
This includes:
- setup and track an Advertizer campaign in CPV Lab or CPV One ad tracker
- setup an Advertizer campaign in Advertizer
- setup the Postback URL tracking to have CPV Lab and Advertizer connected
Step 1. Setup the Advertizer.com traffic source in CPV Lab Pro.
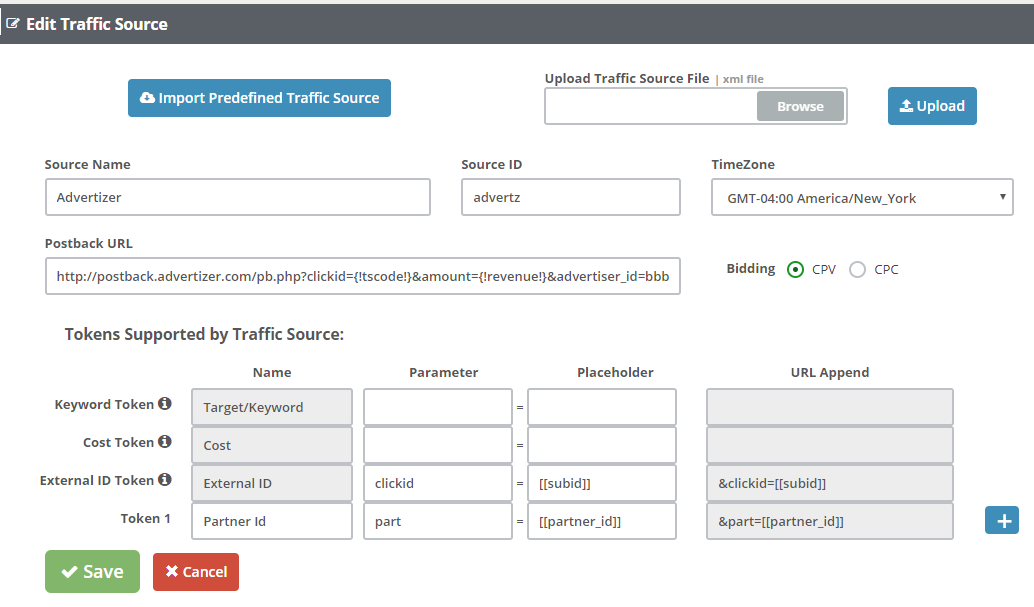
- Go to the Traffic Sources page from the Settings menu and add/edit the Advertizer.com traffic source
- you can import it from the Traffic Source Catalog (for CPV Lab Pro V5+) or you can manually add it, as described below.
- Enter "clickid" as the External ID Token since this will be the parameter that receives the unique code for each visitor.
- Enter the "part" parameter to receive the "partner_id" from Advertizer.com, although this is not always needed (depends on your setup).
- The 2 wildcards (
[[subid]]and[[partner_id]]) will be replaced by Advertizer.com (opens new window) with the corresponding values for each visitor.
TIP
NOTE: These wildcards vary from one traffic source to another, but the setup in CPV Lab Pro is similar for all traffic sources, just the wildcard differ.
The traffic source Advertizer.com (opens new window) sends a unique code for each visitor in the Campaign URL (base.php) page, they call it "click id".
Step2. Create a campaign in CPV Lab Pro | CPV One
- Create a campaign in CPV Lab Pro and use Advertizer as a Traffic Source
- In the campaign Setup page, in the Links & Pixels section, add an additional Pixel/PostBack URL
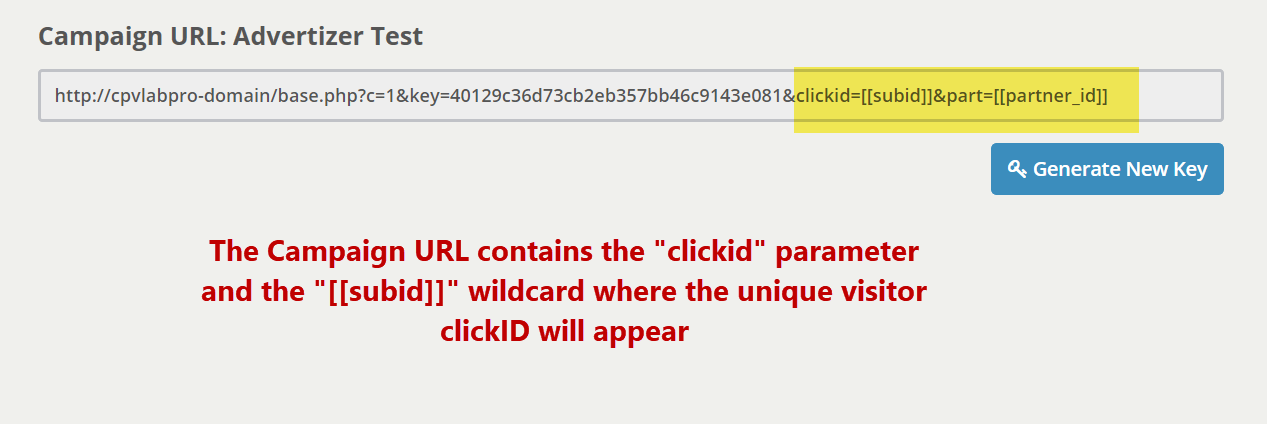
- Take the Postback URL provided by Advertizer.com and replace their placeholders with the CPV Lab Pro specific placeholders
[[subid]]to be replaced with{!tscode!}[[amount]]to be replaced with{!revenue!}

Step 2. Submit to Advertizer.com
- The Campaign URL for the test Campaign now includes the Append Token and it is ready to be submitted to Advertizer.com.
Step 3. Test campaign in Advertizer
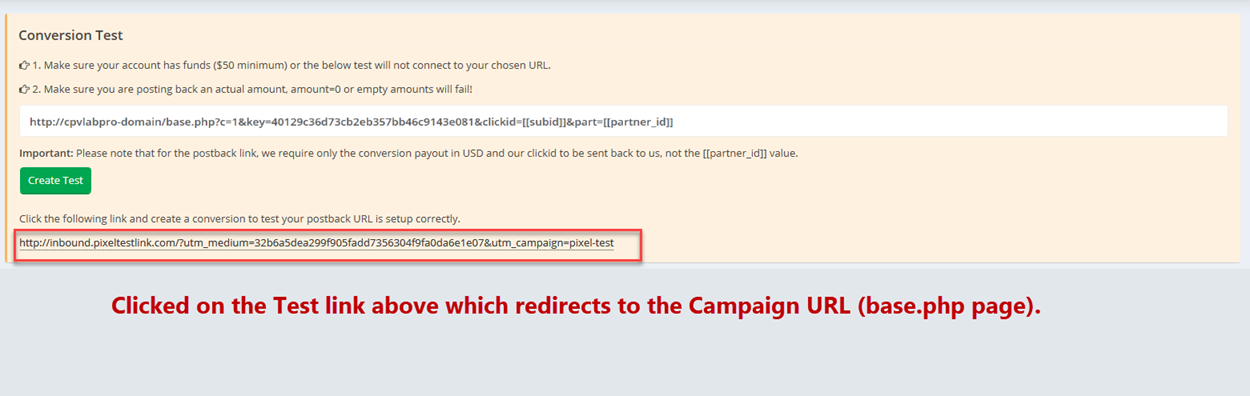
- Enter the CPV Lab Pro Campaign URL in Advertizer.com and click the Create Test button.

Step 4. Test the Link from Advertizer.com
- Click on the Test link provided by Advertizer.com and that will redirect to the Campaign URL with a unique code instead of the
[[subid]]wildcard (6577332914478908778):
Step 5. Call Postback URL
- Take the additional pixel entered in the campaign:
http://postback.advertizer.com/pb.php?clickid={!tscode!}&amount={!revenue!}&advertiser_id=bbbbbbbbb&key=fa086783f864185b66abe8e93aabd3d1
- Replace the 2 wildcards with actual values in order to call the postback URL and confirm the conversion.
- In the example below
{!tscode!}was replaced with the unique visitor code (6577332914478908778) and{!revenue!}with 0.10 (test revenue):
- In the example below
- Call this URL in a browser to simulate the postback URL. You could also go through the offer page and register a conversion, that would also fire the postback URL. Just make sure that you setup the CPV Lab Pro Tracking pixel (
adclick.php page) at offer source. Any of the pixel variations provided in the campaign setup page would work, choose what will work for the offer source.