CJ Affiliate integration in CPV Lab Pro
Who is CJ Affiliate?
CJ Affiliate (opens new window) (formerly Commission Junction) is one of the world’s largest and oldest affiliate networks.
- It specializes in pay-for-performance programs and offers a huge catalog of offers to choose from.
- CJ Affiliate has a different way of reporting conversions and unlike most affiliate networks, they don’t offer an option to place a Tracking Pixel or to define a Postback URL. In this case conversions should be retrieved through their API.
TIP
The API integration is now available in version 9 and it requires a one-time configuration, then it will periodically retrieve conversions.
Requirements
- CJ Affiliate account
- CPV Lab Pro (opens new window) version 9 instance
- Ability to setup a Cron job on your server
Campaign Configuration
- First thing to do is to import the CJ Affiliate network into your CPV Lab Pro instance.
- This can be done from the Offer Sources page. You only need to do this step once, no matter how many campaigns you will create.
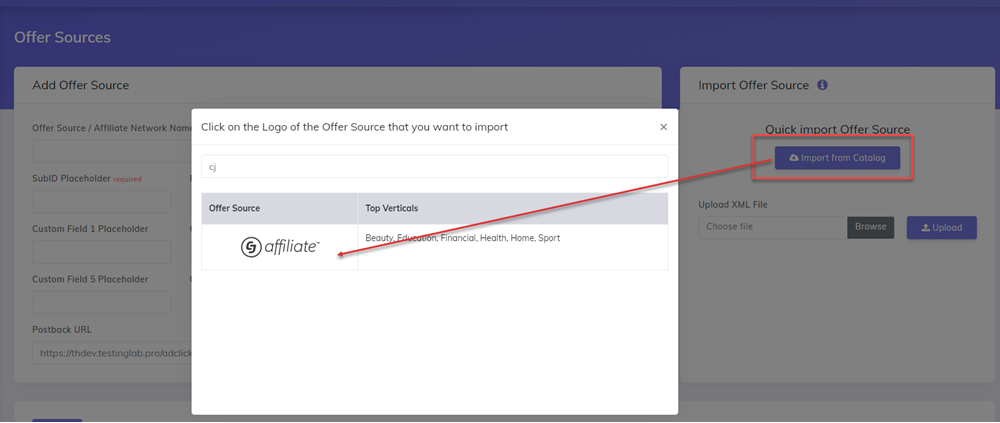
- here are the details:
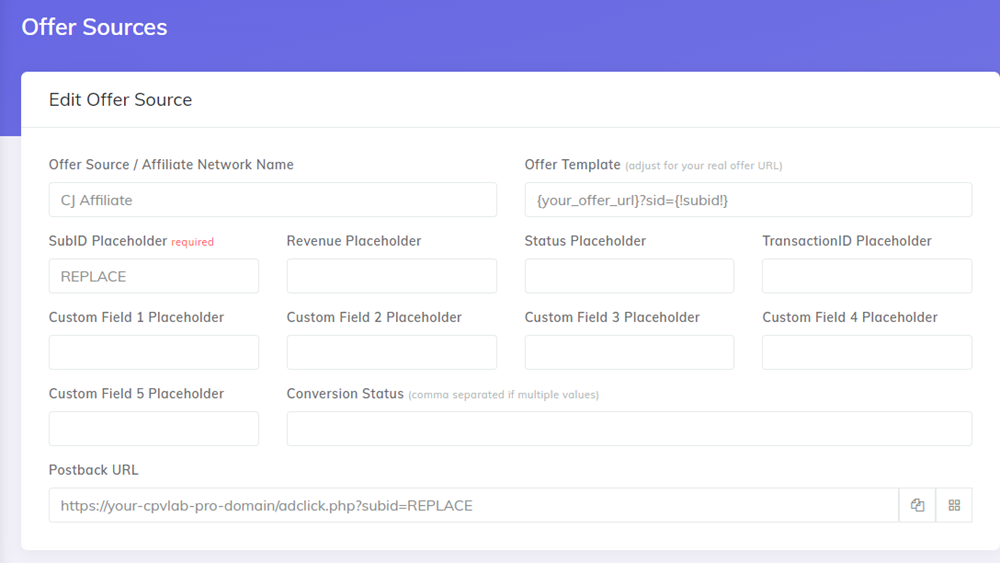
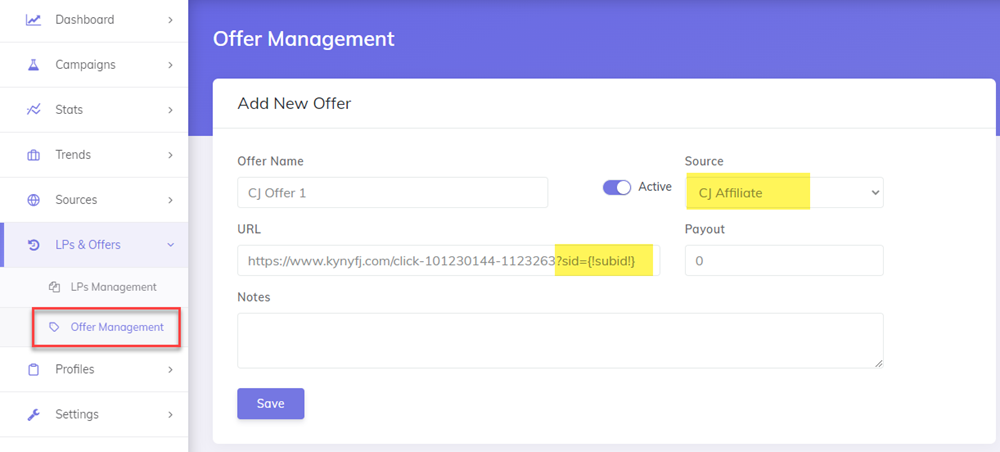
- Add your offers in the Offer Management section
- the offers have to be in the same format as in the Offer Template field from the step above
- This means that you need to end the Offer URLs from CJ Affiliate with
?sid={!subid!} - A typical CJ Affiliate URL should be entered in CPV Lab Pro such as: https://www.kynyfj.com/click-101230144-1123263?sid={!subid!}
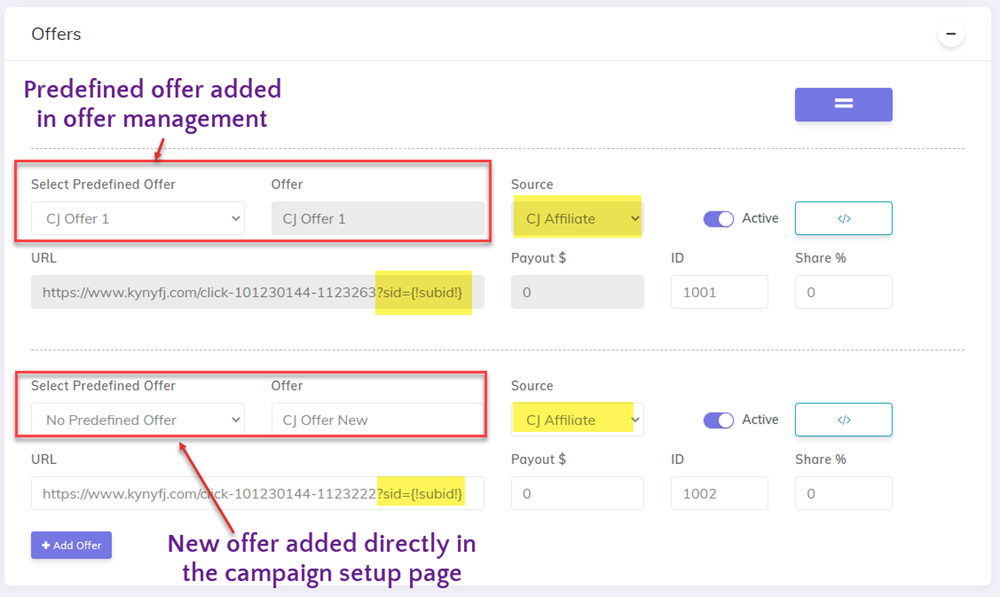
3.Setup your campaign and enter the Offer URLs from CJ Affiliate
- you can select from the predefined offers defined on the step 2 above OR
- you can enter new offers as shown in the Offer Template field.
- This means that you need to end the Offer URLs from CJ Affiliate with
?sid={!subid!}
- This means that you need to end the Offer URLs from CJ Affiliate with
WARNING
The ?sid={!subid!} will ensure that CPV Lab Pro adds the subID (unique code for each visitor) in the Offer URL and this will be used to identify converting visitors.
Cron job configuration
- The CJ Affiliate Integration via API is done by configuring a Cron job on your server.
- This step needs to be done only once and it will work for all existing and future campaigns that have CJ Affiliate offers configured as described above.
1. Access token
First you need to generate an access token (API key) in order to allow CPV Lab Pro to call the CJ API.
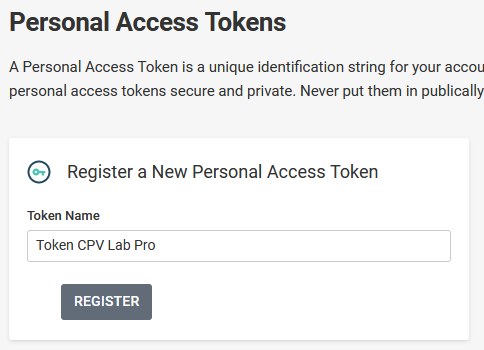
This can be done from the Personal Access Tokens (opens new window) page from your CJ account
Enter a name for the access token (like “Token CPV Lab Pro”) and then click the “REGISTER” button.
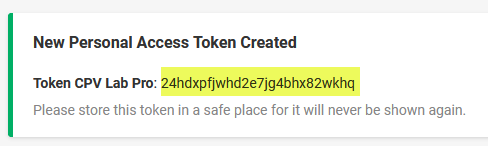
- You will be provided with an Access Token consisting of a string of alphanumeric characters. Save this token somewhere safe as it will not be shown again!
2. Customer ID
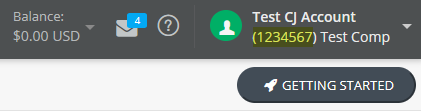
- Then you need to get your customer ID from your CJ account.
- Look at the top-right part of your account and you will see your name and a numeric code below it. The numeric code is your customer ID (in my example below it is 1234567):
3. Cron Job
Now you need to configure the Cron job in cPanel by following the next steps:
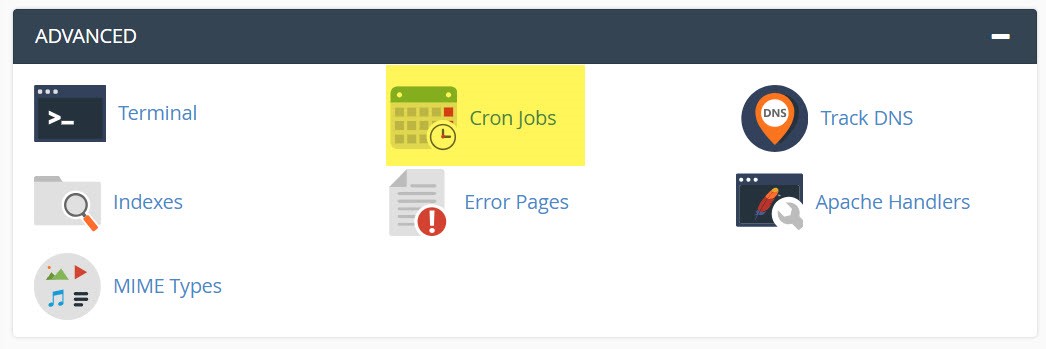
Step 3.1. Login into cPanel and find the ‘Cron jobs’ page
Step 3.2. Enter the Cron job details in this page.
- The recommended interval for the job is “Every 1 Hour”, meaning that you have the enter “0” for Minute and “*” for Hour, Day, Month, Weekday.
- Then enter the command with the correct path for your server:
cd /home/<server-name>/public_html/; php cron-cj-conversions.php cust=<customer-ID> token=<access-token>
WARNING
Make sure that you:
- set the correct server path to your CPV Lab Pro instance in the Cron job command
- replace
<customer-ID>with your customer ID from above - replace
<access-token>with your access token generated above
- For our example above, the Cron job command would be:
cd /home/<server-name>/public_html/; php cron-cj-conversions.php cust=1234567 token=24hdxpfjwhd2e7jg4bhx82wkhq
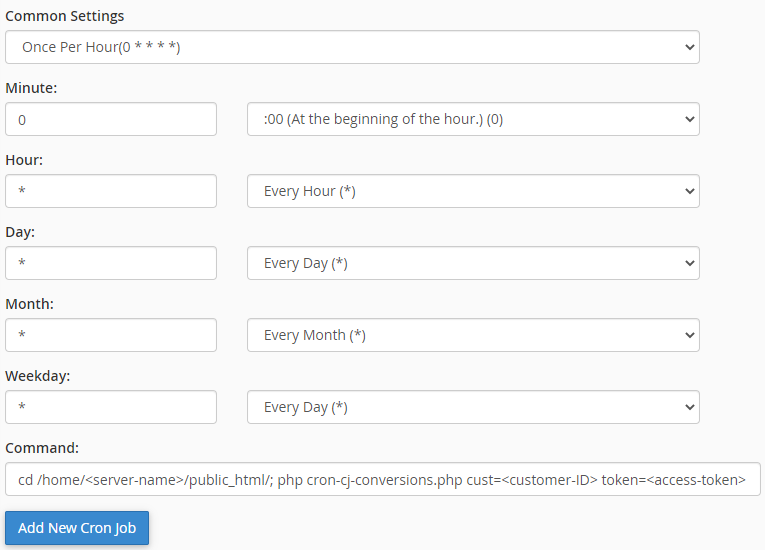
Step 3.3. Click the “Add New Cron Job” button
Click the “Add New Cron Job” button and the new job will appear in the list of Cron jobs.
Now the configuration is complete. You should wait to get a few sales in CJ Affiliate from visitors that had the subID appended, then those conversions should also appear in CPV Lab Pro.
4. Testing the Cron job
- Each time the Cron job runs, you will see 2 entries in the Log page with the following details:

- Check after 1 hour of the initial Cron job setup to see if you have those entries in the Error Log page. The entry containing “CRON CJ job finished” will also show the number of conversions imported.
- If the 2 entries appear in the log, this means the Cron Job is working and the integration with CJ Affiliate is working fine 😃