Evadav integration in CPV Lab Pro
Who is Evadav?
Evadav (opens new window) Evadav is a leading advertising platform that trades native ads, push notifications, in-page, and popunder traffic on CPM and CPC basis. We serve 2+ billion impressions per day and strive to be the best in our class.
It comes with:
- NATIVE - Native ads are always shown within the site's content, ensuring ultimate viewability for your creatives. Native banners have click rates that are eight times higher than regular formats. They represent a very effective tool for building audience engagement
- PUSH - Push notifications take advantage of a subscriber’s previous consent to deliver ads instantly to any device. This form of ad is visible even when the user is not browsing.
- IN-PAGE - In-page ads are displayed directly on the website. They works with all browsers and platforms, and especially work well with iOS. Non-intrusive, they provide an access to an audience that might be tired of push formats.
- POPUNDER - Popunders appear behind a browser window, and are fully visible once the main window is closed or minimized. They are only shown to unique viewers once a day or with optimal frequency. This means that budgets are not drained when a user repeatedly goes to the same site.
Step 1: Setup Evadav in CPV Lab
- CPV Lab comes with the Evadav Traffic Source pre-configured in the Traffic Sources Catalog pages, so in this case all you have to do is import it from the Catalog.
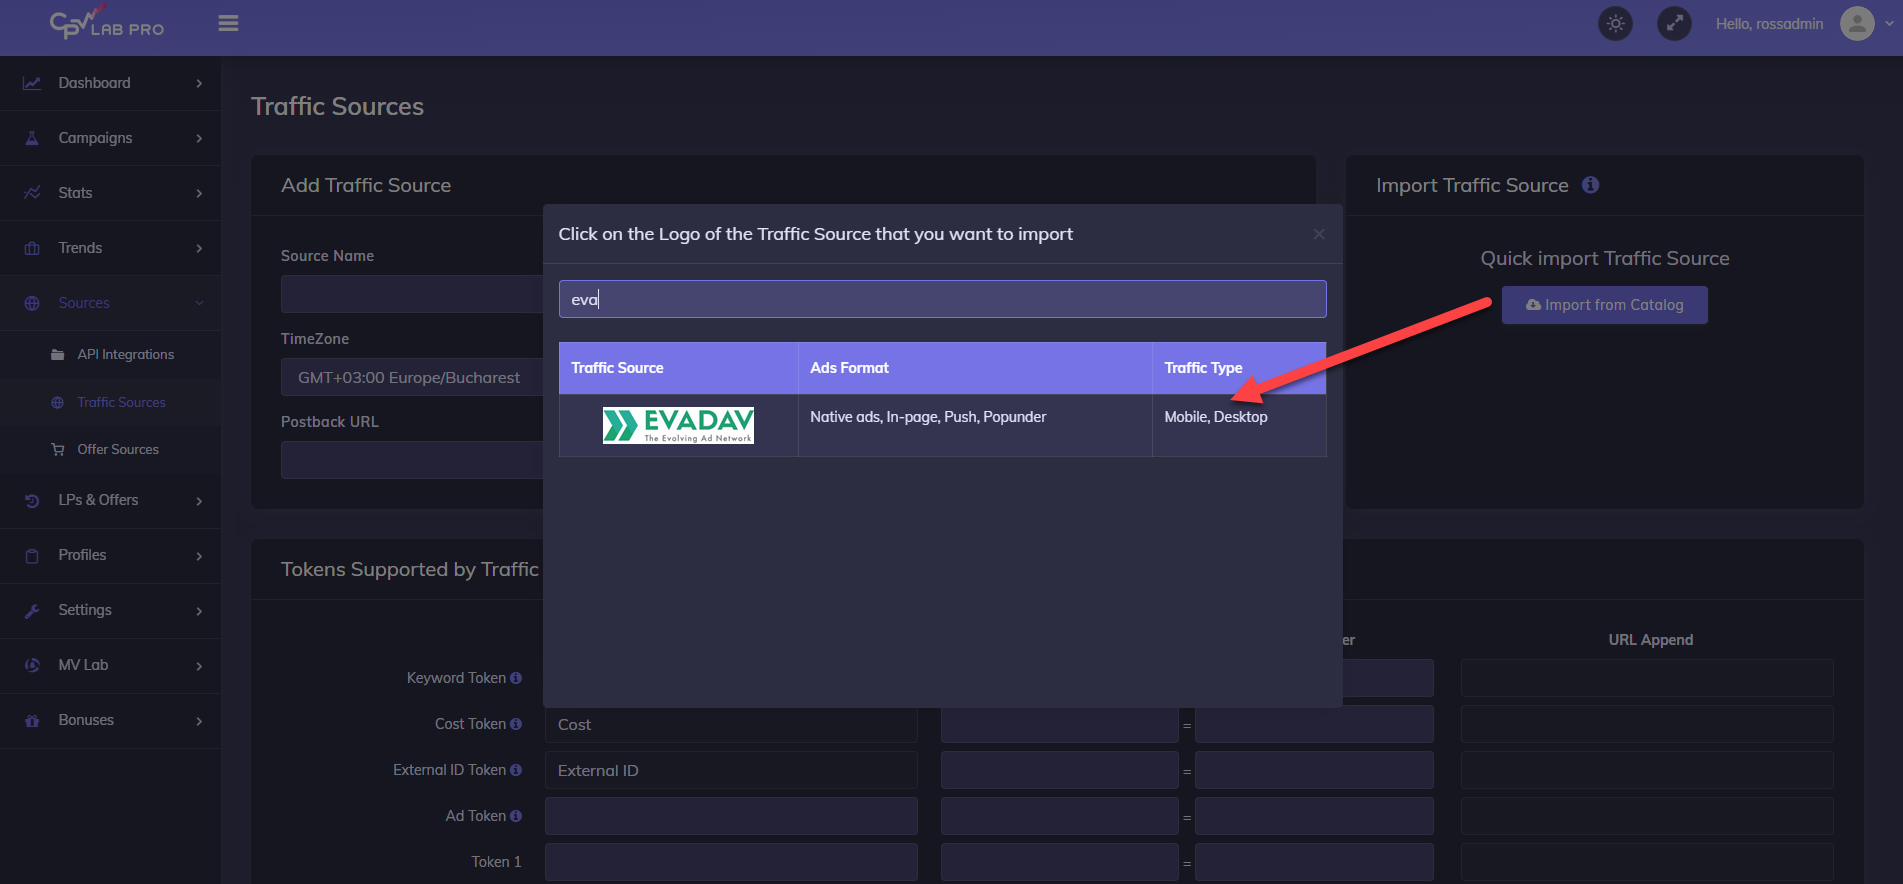
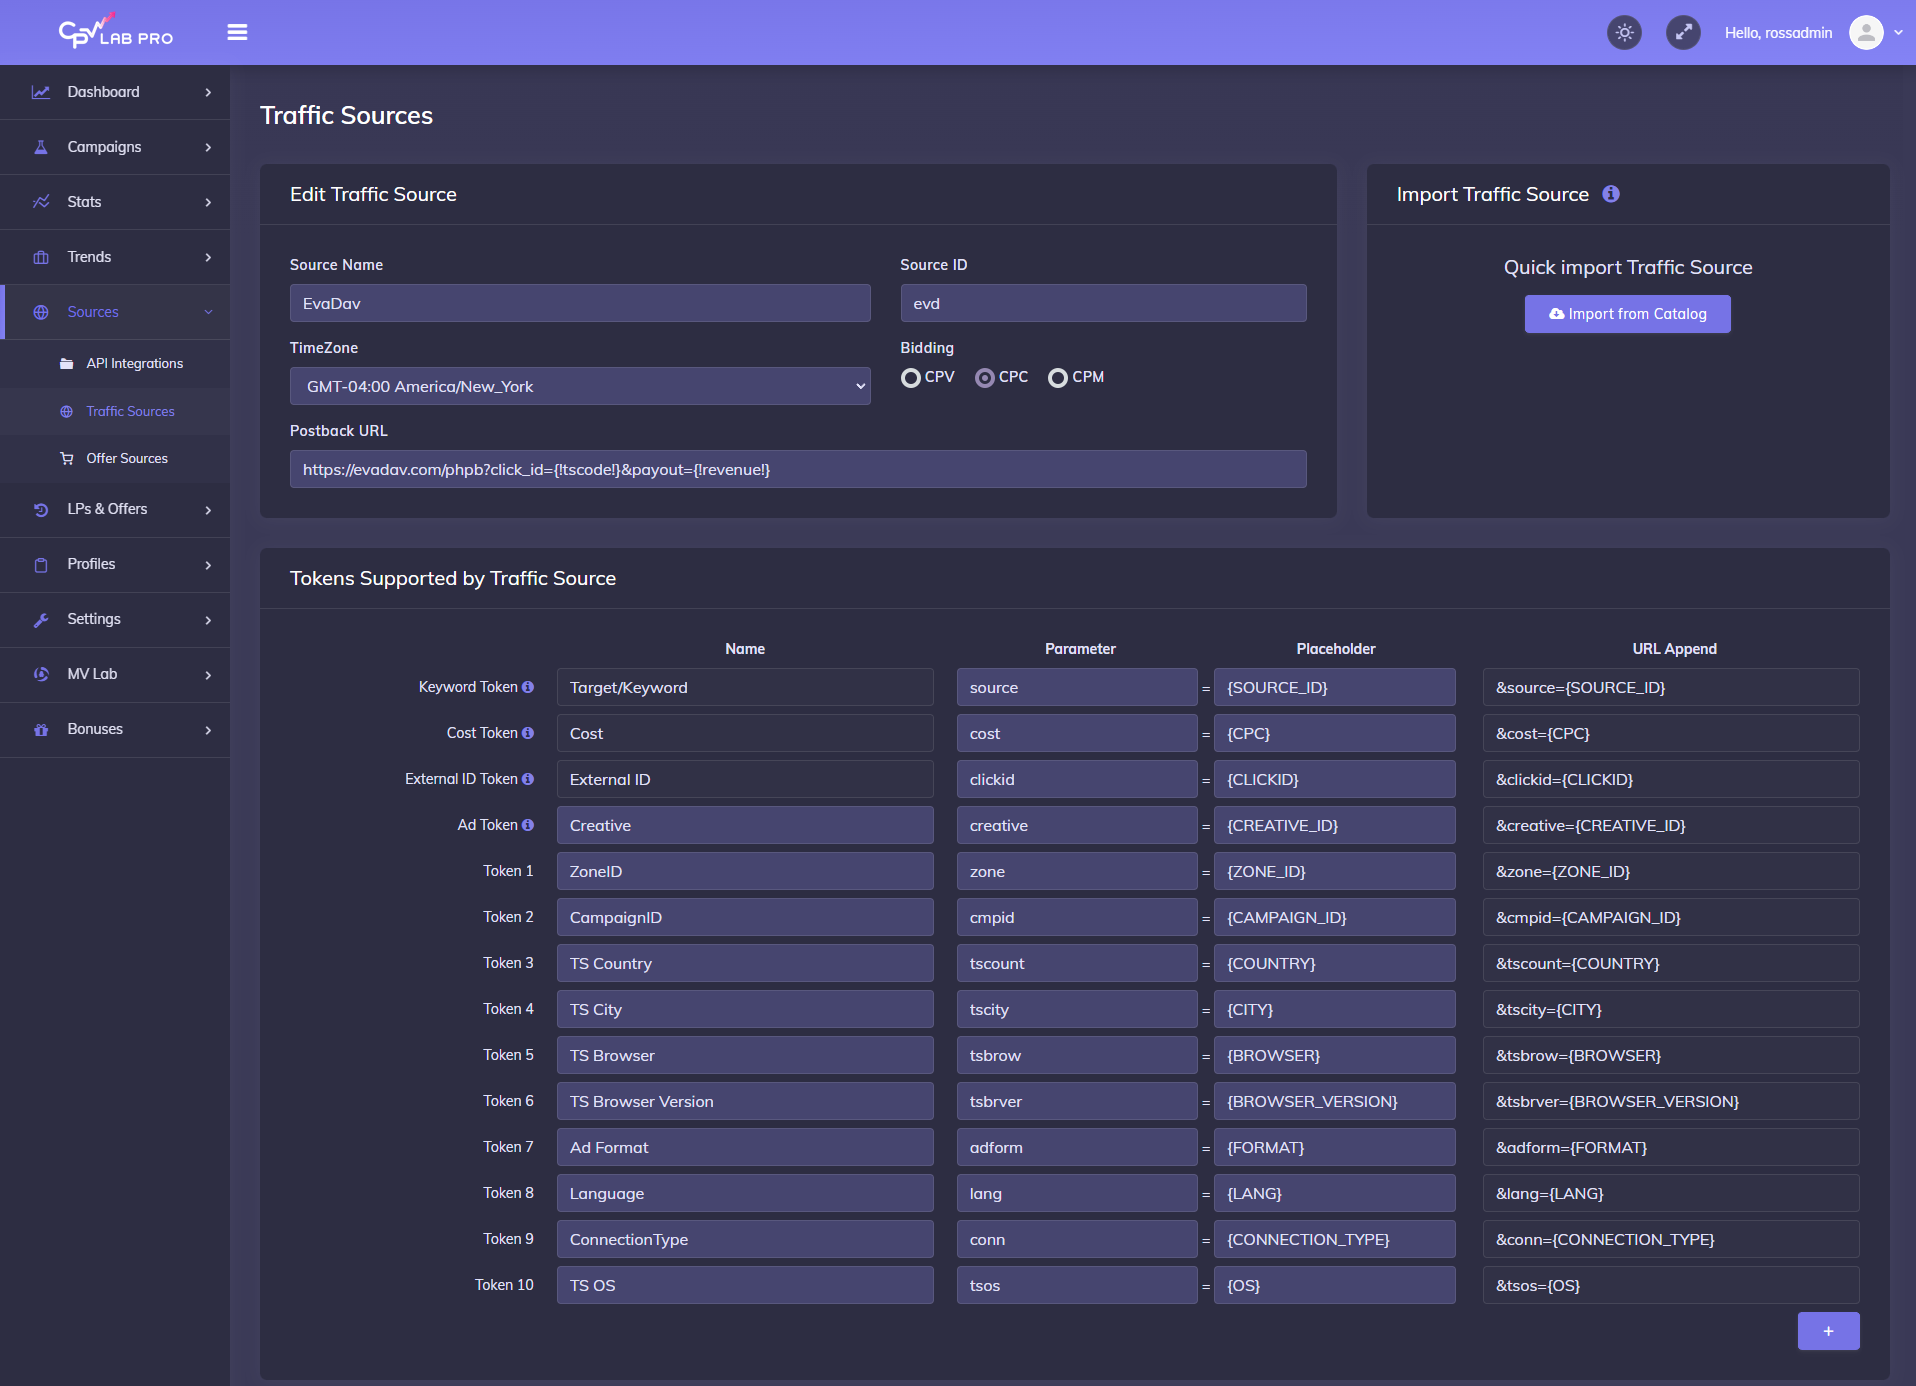
- The detailed configuration for the Evadav Traffic Source is the following:
Once you import the traffic source from the catalog, it will show up when you create your campaign on the Campaign setup page.
To be able to keep your tracker and your Traffic Source reports in sync, you need to send data back to your traffic source. In EVADAV, Postback URL is imported automatically from our catalog. You only have to check it
Save the Traffic Source
![]()
- Once you have the Traffic Source setup you can start creating your campaign
Step 2: Create a Campaign in CPV Lab
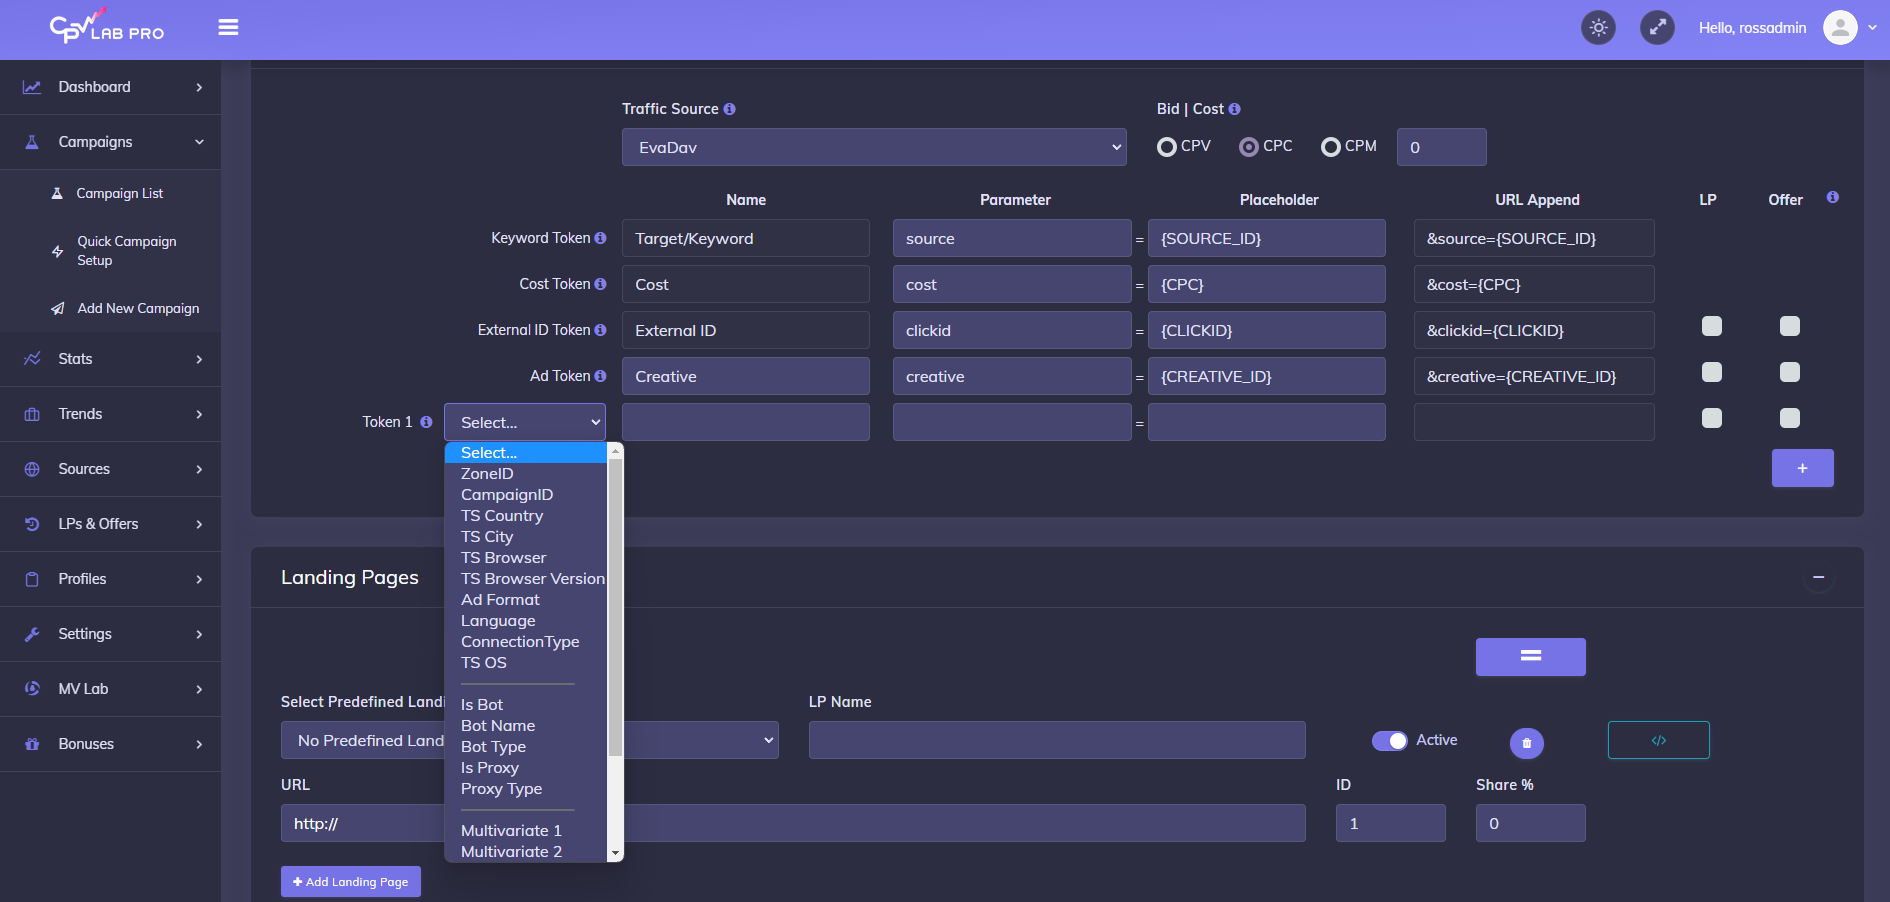
- In your CPV Lab campaign setup page select Evadav as the Traffic Source and choose the Predefined Extra Tokens that you want to capture.
- Complete the other fields
- Save the campaign
- Optional: check the Traffic Source Postback URL - check the step 5 below for details
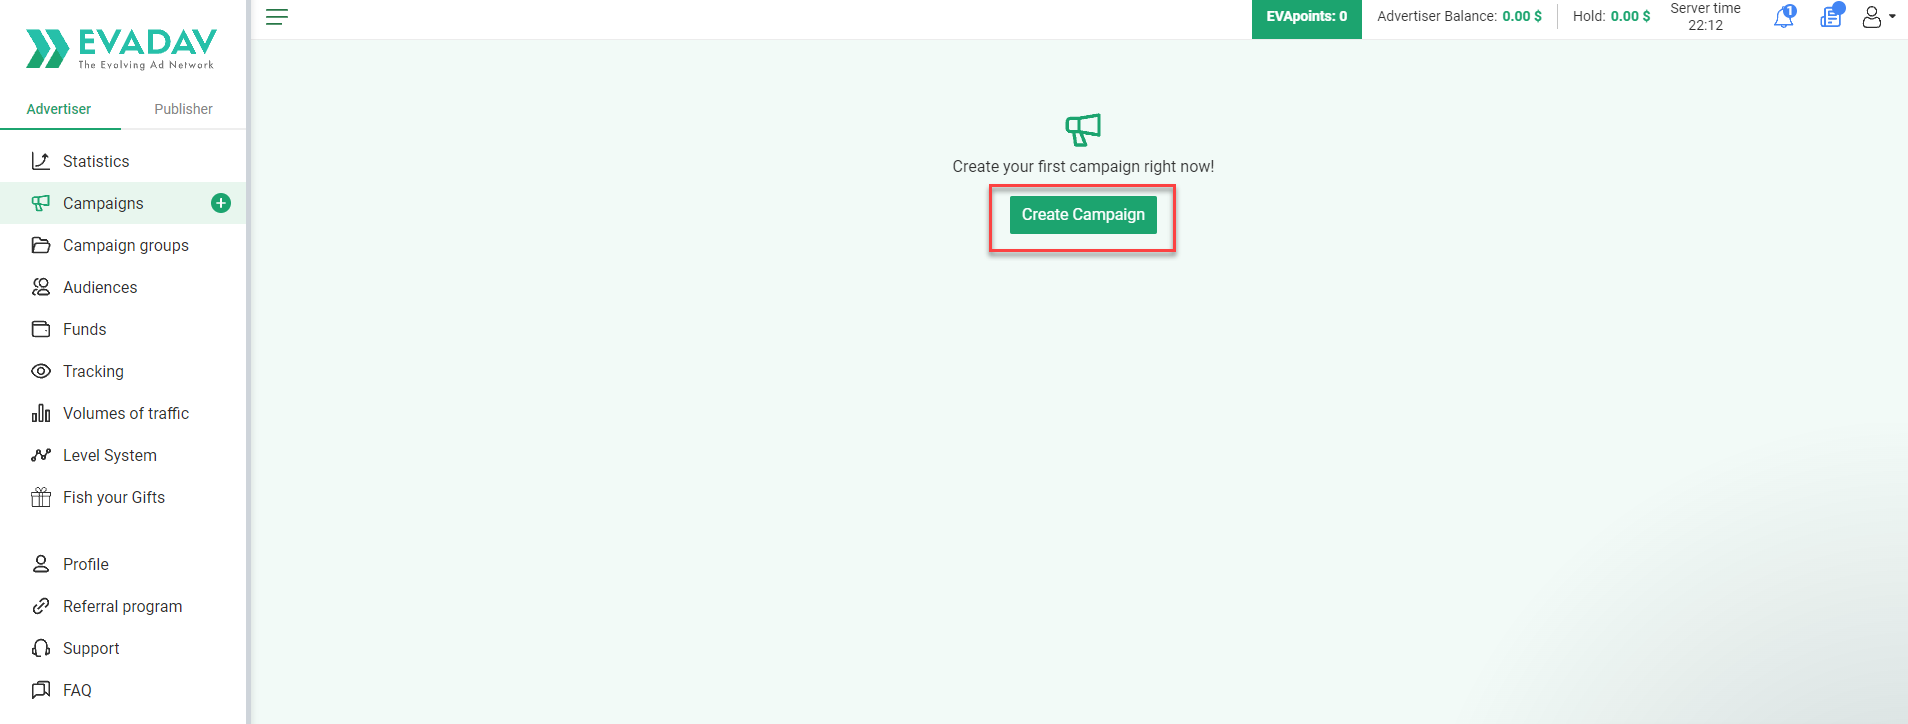
Step 3: Create the campaign in Evadav
- Login to your Evadav account
- Create a new campaign by selecting the "Campaigns" menu
- Then click on “Create Campaign”
- Choose the advertising format: Popunder / NativeAds / Push / InPage
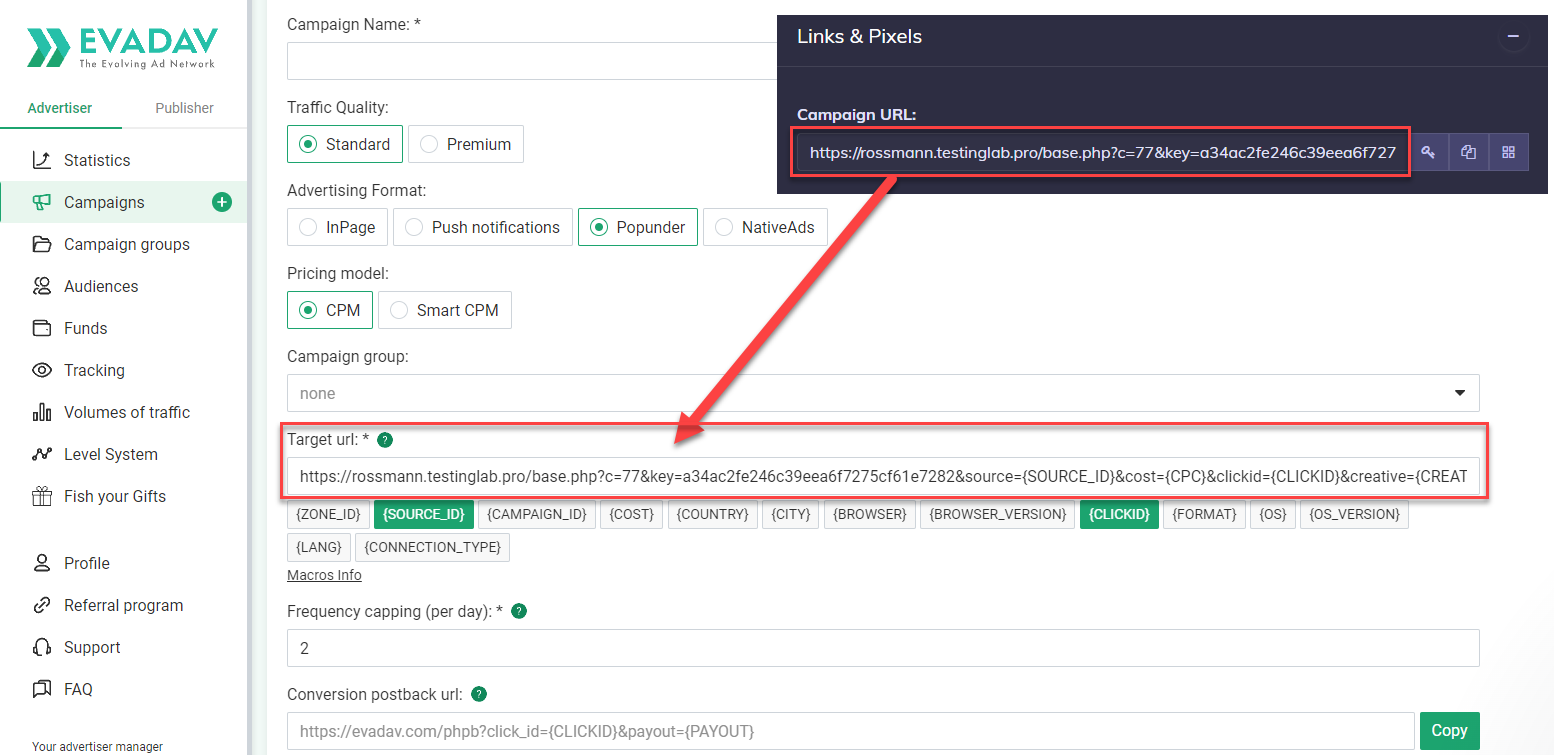
- On the Target URL field, copy the Campaign URL from your campaign in CPV Lab ( step 2 above ) and paste it as a Landing URL in EVADAV (this is your tracking link)
- Finish the campaign by filling all the other fields and click "Save".
Step 4: Start the campaign in Evadav
In Evadav platform, by default, after it is created, the campaign is sent to moderation. Wait until you get the confirmation to start the campaign.
Start your campaign and follow the results in CPV Lab!
Step 5 (optional): Setup the Postback URL
- In order to track conversions back into the Evadav platform, you need to CHECK the Traffic Source Postback URL in your tracker.
- The Postback URL should contain the CPV Lab Pro macro
{!tscode!}(for Unique Click ID). - The Traffic Source Postback URL will be automatically filled for the selected Traffic Source in the Campaign setup page, but you need to select/check it in order to have it used (check image below).
- It is located in the "Tracking Pixel" section from your campaign page.
- The Postback URL should contain the CPV Lab Pro macro
![]()
- The postback URL is in the following format:
https://evadav.com/phpb?click_id={!tscode!}&payout={!revenue!}