Kadam integration in CPV One
Who is Kadam?
Kadam (opens new window) is a large ad network with maximum profitability for publishers and advertisers. Key formats include banners, teasers, push, clickunders and native ads. It covers all GEOs of the globe, 10+ billion impressions per day and millions of high-quality conversions across any verticals.
The platform includes built-in analytics tools, extensive targeting options, an effective anti-fraud system and integration with popular affiliate networks. CPM, CPC, CPA Target — you can use any of these payment models. You can replenish your personal account using any method, including crypto. Self-service and full management options are available. You can also get help with creatives, settings and optimization.
Benefits of Kadam.net:
- Effective budget management
- Advanced targeting and retargeting tools
- Analytics and statistics
- System improvements and enhancements
Below is a step by step tutorial showing how to easily track Kadam traffic with CPV One and CPV Lab affiliate marketing tracker.
TIP
For this tutorial we are using CPV One (opens new window) cloud-hosted click tracker, but the setup is the same for CPV Lab Pro (opens new window) self-hosted affiliate marketing tracker.
Step 1: Add Kadam as a traffic source in CPV One | CPV Lab
CPV One comes with the Kadam Traffic Source pre-configured in the Traffic Sources Catalog pages, so in this case, all you have to do is import it from the Catalog.
- Access your CPV One account
- Navigate to the "Sources" tab and locate the option for "Traffic Sources"
- Click on the "Import from Catalog" button
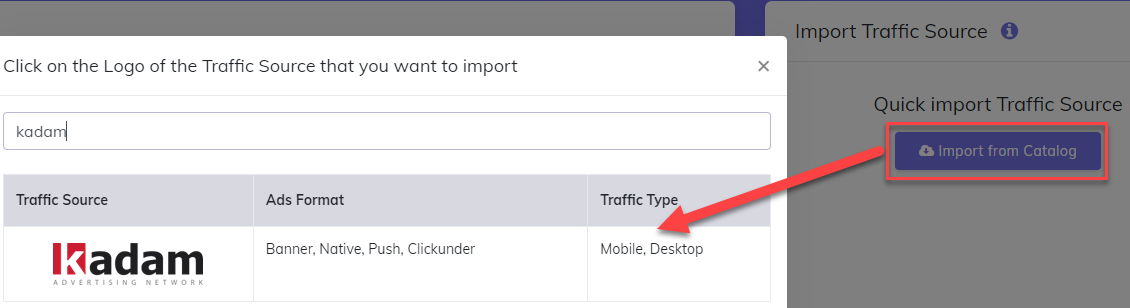
- Select Kadam
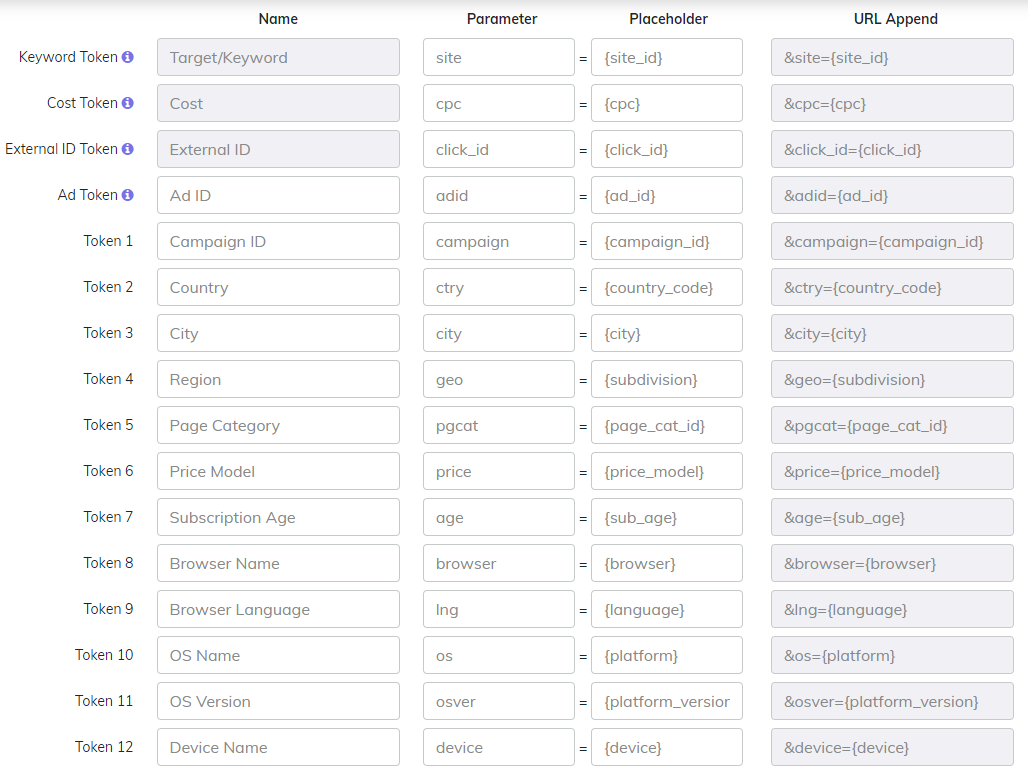
- CPV One will pre-populate all the traffic source settings.
Step 2: (Optional) Add an Offer Source to CPV One | CPV Lab
If you are not utilizing an Offer from an Affiliate network, please proceed to Step 3.
To integrate an Affiliate network, navigate to the "Sources" section and select "Offer Sources." Go to the "Import from Catalog" where you will discover a selection of Affiliate networks available for integration.
If your specific Affiliate network is not listed, you have the option to manually define the parameters required by the affiliate platform you are using and save it.
More info about Affiliate Networks
Step 3: Adding Landing Page & Offer URLs to Campaigns
Before creating a campaign you need to make sure you have your landing pages and offers defined. Once you define your landing pages and offers, you can then use them for your campaigns.
- To add Landing pages go to LPs&Offers -> LPs Management menu
- To add new offers go to: LPs&Offers -> Offer Management menu
Step 4: Set up your campaign in CPV One | CPV Lab
To start your campaign, click on the top blue button that says: "New Campaign".
You will encounter a menu providing options for creating a campaign based on your preferences.
- Alternatively, you can navigate to the Campaigns List and select your desired campaign from there and edit or clone one of them.

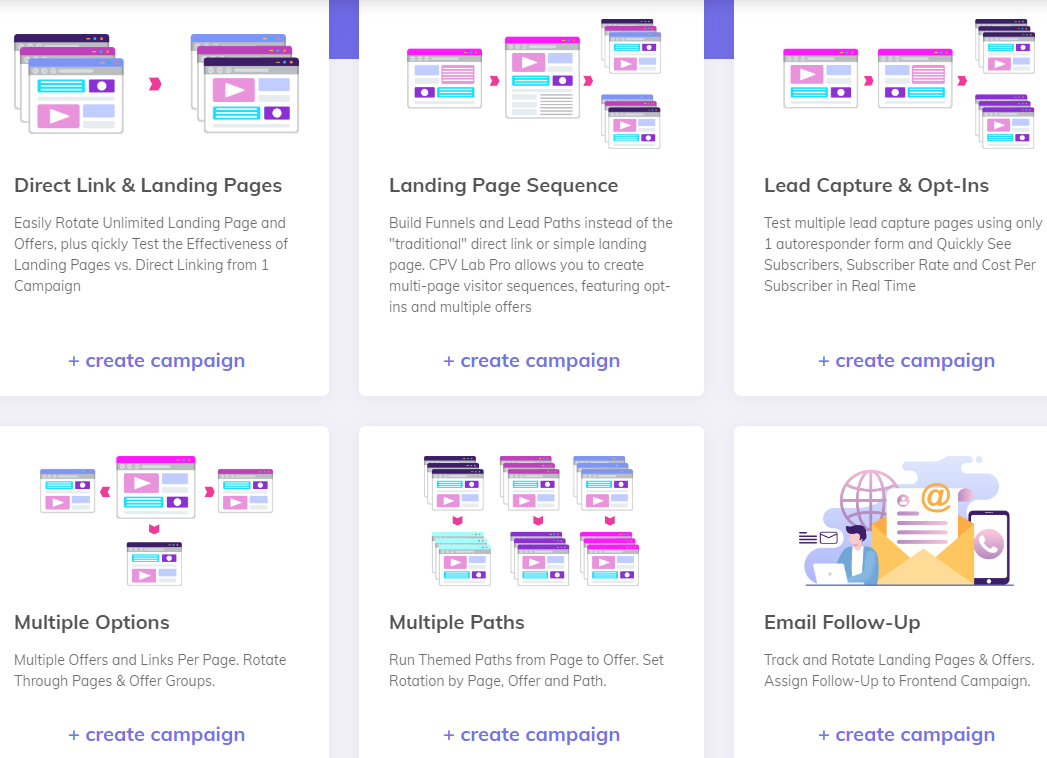
In this tutorial, we will be using a "Direct Link & Landing Page" configuration.
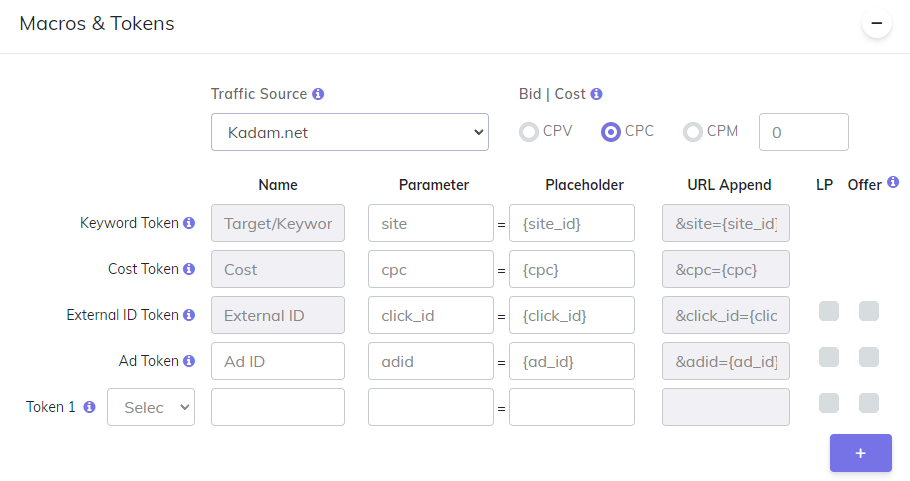
Begin by assigning a "Name" to the campaign, fill the other fields from General Settings and Tracking settings, and then proceed to scroll down to the section labeled "Macros & Tokens".
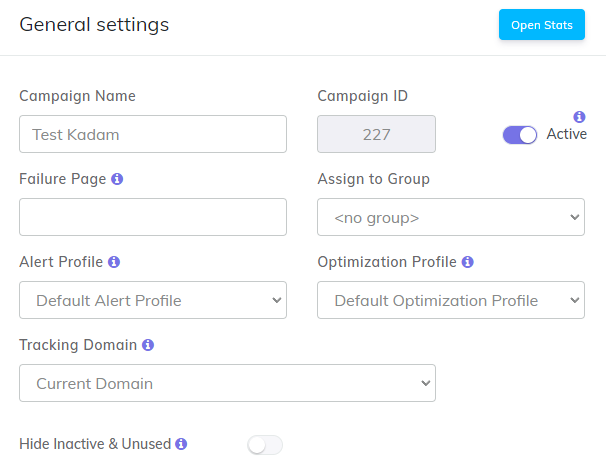
- Choose Kadam as the designated Traffic Source for this campaign.
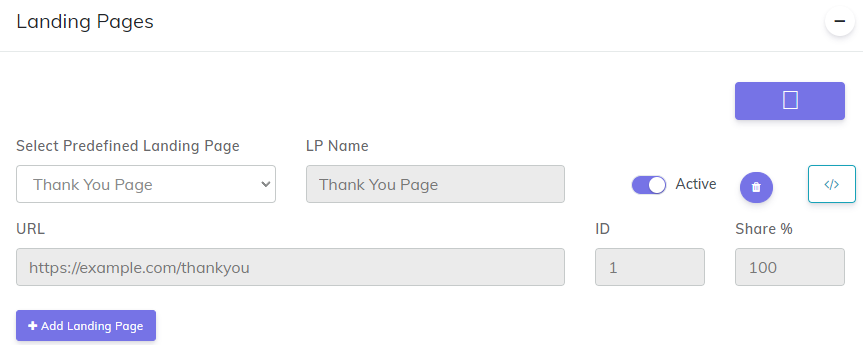
Keep scrolling down the page. If you use a Landing Page, you can input it at this stage in the "Landing Pages" section;
Under the "Offers" section, click on "Select Predefined Offer" and choose the Offer you previously created in Step 2 above. The remaining parameters will be automatically populated based on the settings defined for the selected Offer.
Step 5: Setup the Postback URL
In order to track conversions into the Kadam platform, you need to set up the Postback URL from Kadam as the Traffic Source Postback URL in the Campaign setup page from CPV One.
The Postback URL should contain the CPV One macro {!tscode!} (for Unique Click ID).
The Traffic Source Postback URL will be automatically filled for the selected Traffic Source in the Campaign Setup page, but you need to select/check it in order to have it used (check the image below).
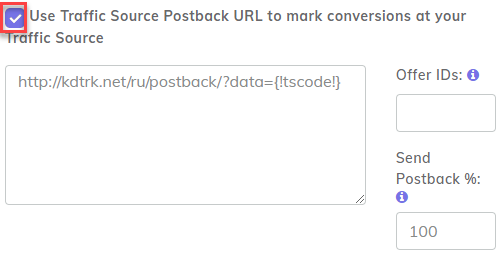
- If the Postback URL is not available (it was not set up or was deleted for this Traffic Source) then you can enter the following Postback URL as Traffic Source Postback URL in the Campaign Setup page from CPV One:
http://kdtrk.net/ru/postback/?data={!tscode!}
TIP
Sending conversions to the traffic source allows the traffic source to optimize the attribution algorithm for your campaigns. It is highly recommended to send information about conversions back to the traffic source.
Step 6: Create the campaign in Kadam
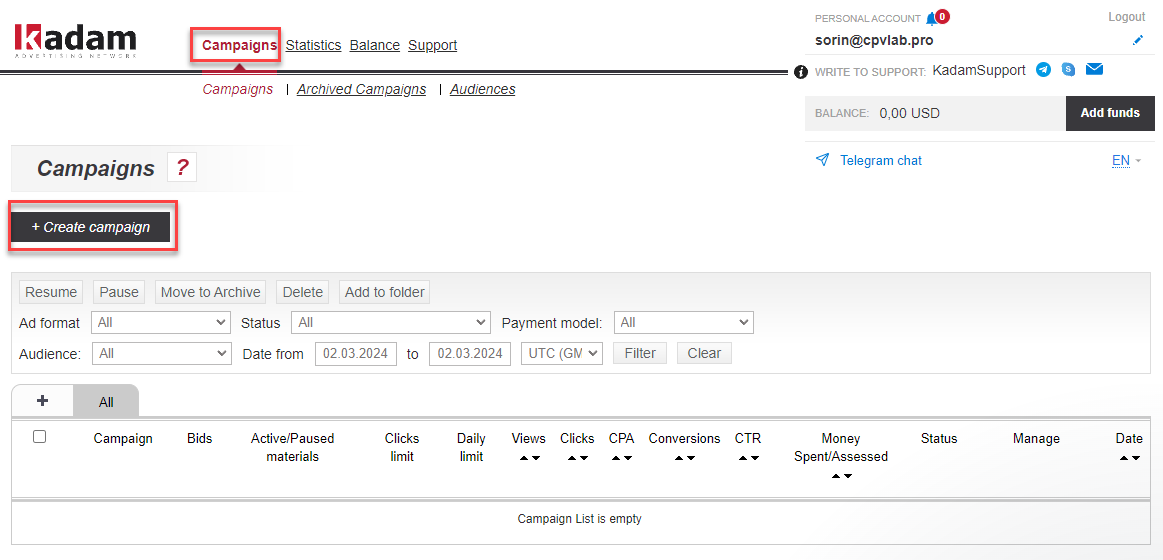
- Login to your Kadam account
- Create a new campaign by selecting the "Campaigns" menu
- Then click on “+Create Campaign”
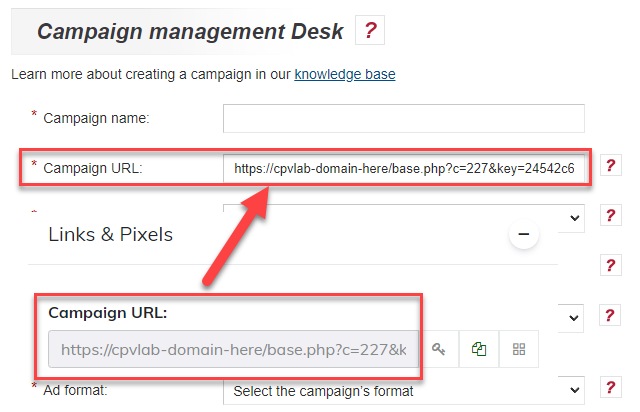
- In the Campaign URL section, paste the Campaign URL from CPV One | CPV Lab.
- The Campaign URL (provided in the "Links & Pixels" section from your Campaign Setup page) has all the parameters you selected as Macros for your campaign. So, the information will be tracked in your tracker.
Complete all the other fields and save.
If the setup has been done correctly, you will start seeing conversions both in CPV One | CPV Lab and Kadam.
You may find useful: Tracking Links explained