PopCash integration in CPV Lab Pro
Who is Popcash?
Launched in early 2012, PopCash (opens new window) is a highly specialized popunder network, with global coverage and a dynamic bidding system, ready to help advertisers get valuable traffic and publishers monetize their space to its full potential.
It comes with:
- Self-Served Platform
- Intuitive Interface
- Own Ad Server
- Advanced Targeting Options
- Quickly Updated Reports
- Traffic Fraud Detection
- Campaigns' Optimization
- Fast Approvals
- $5 Minimum Deposit.
If you don't have a Popcash account yet, then you need to register here (opens new window).
Step 1: Setup PopCash in CPV Lab
- CPV Lab Pro comes with the PopCash Traffic Source pre-configured in the Traffic Sources pages, sso in this case all you have to do is import it from the Catalog.
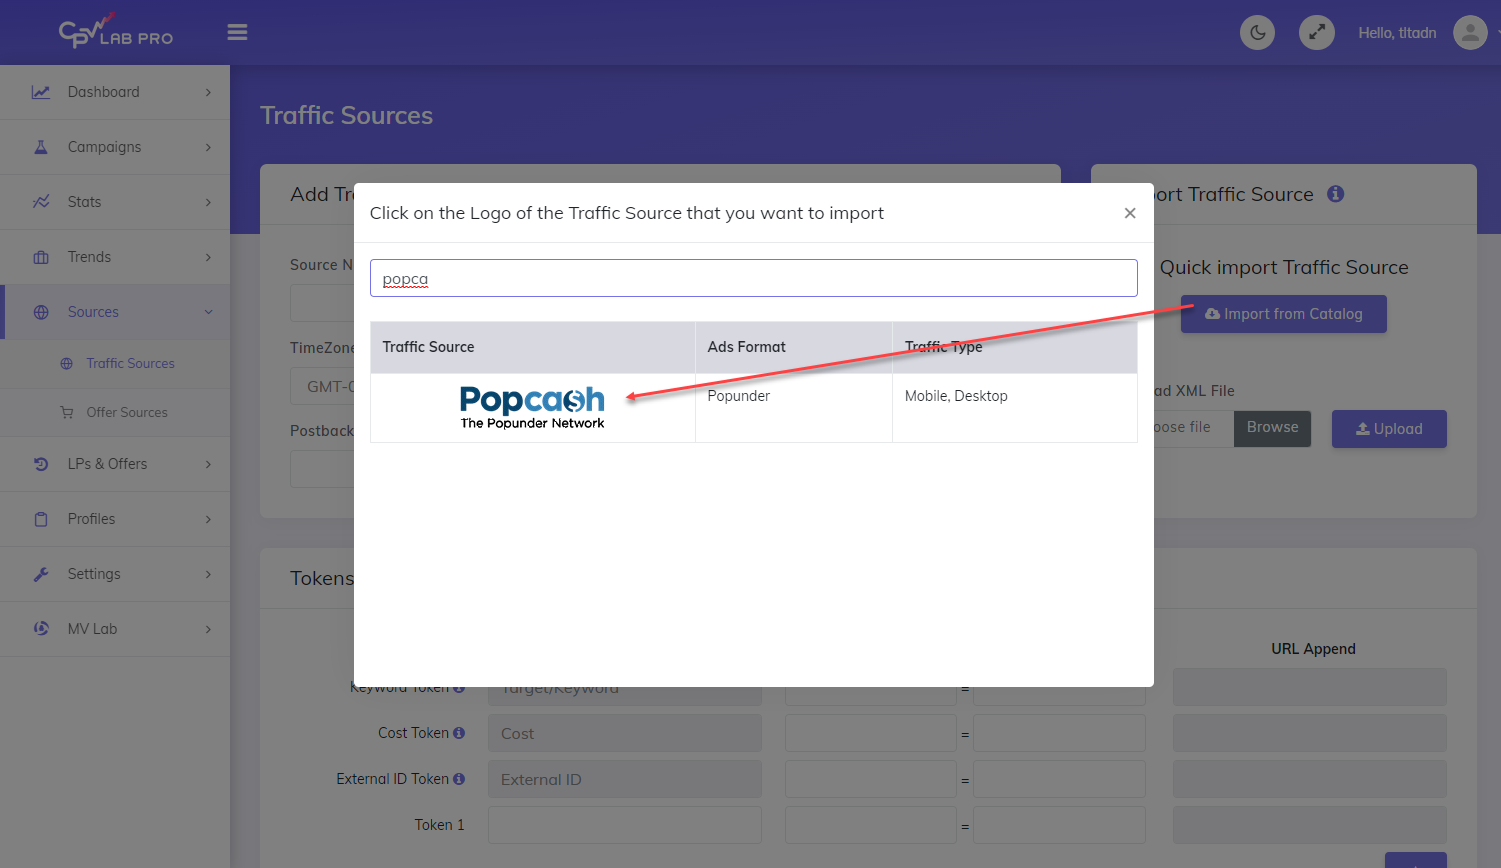
- The detailed configuration for the Popcash Traffic Source is the following:
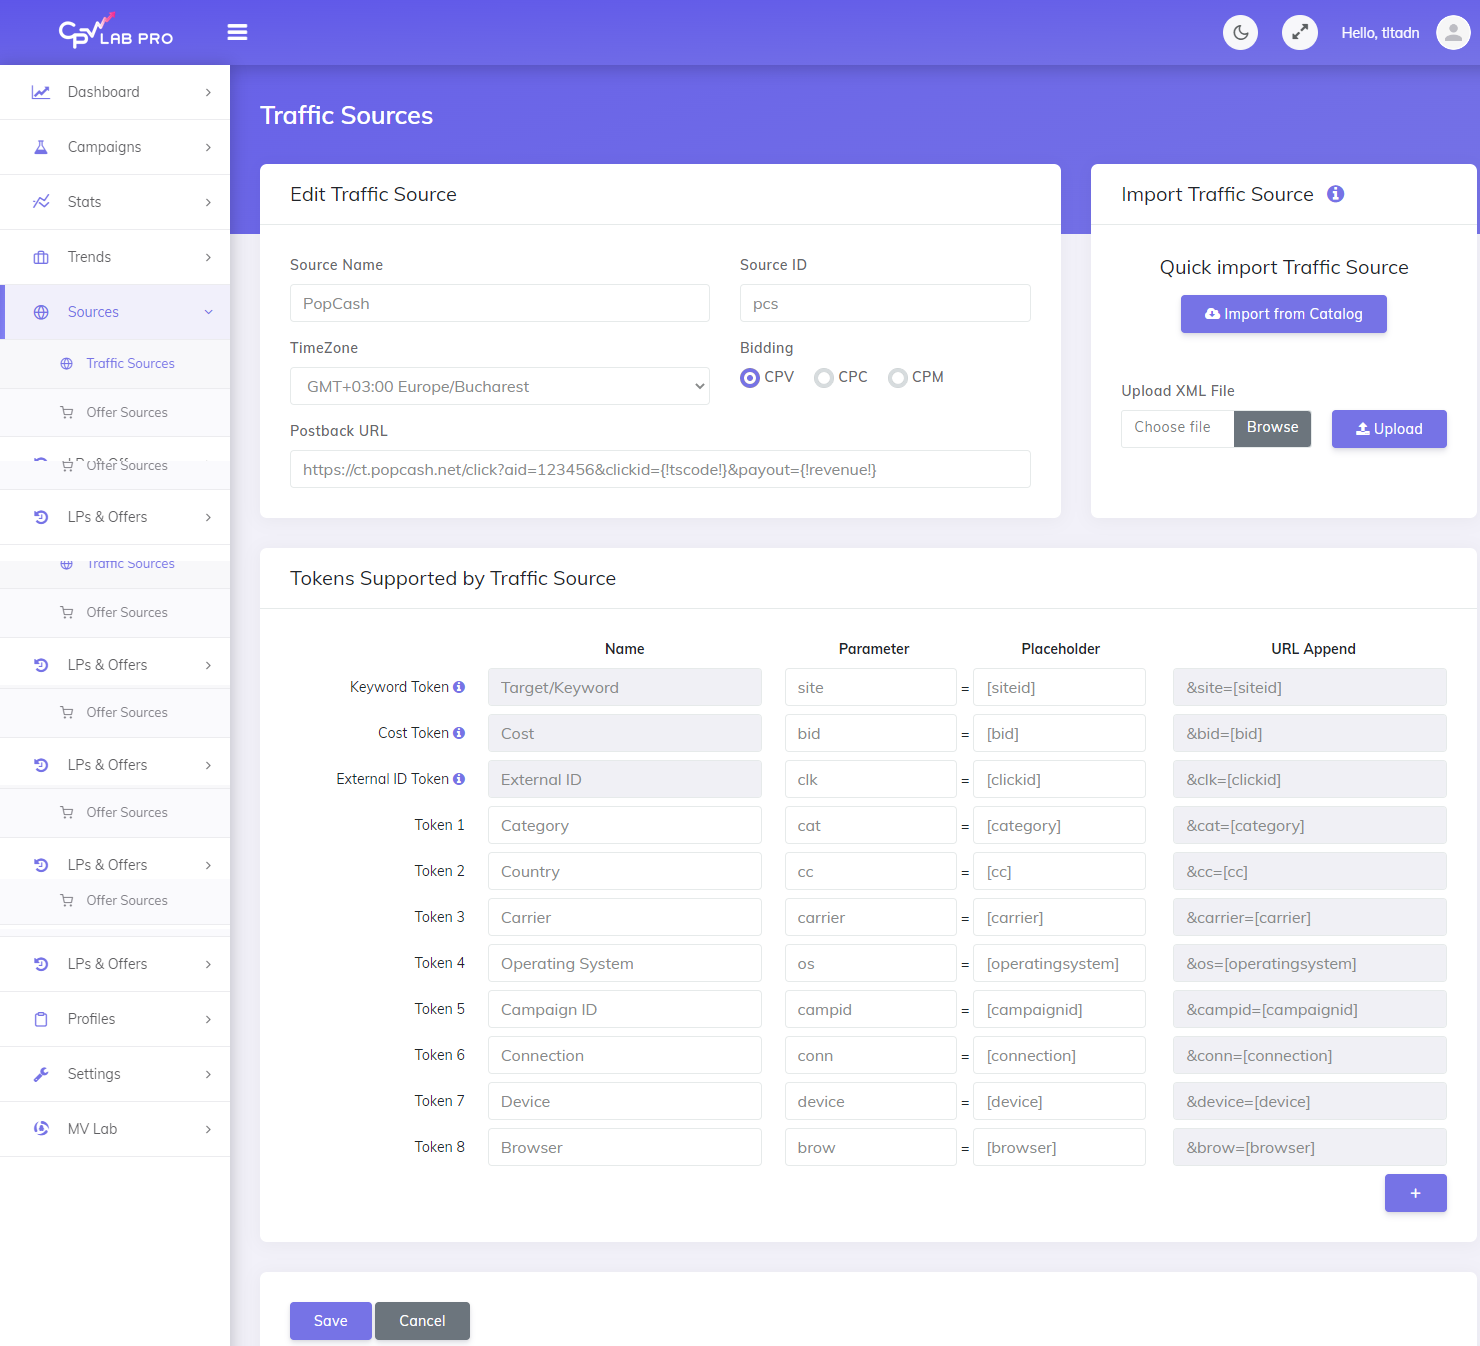
Once you import the traffic source from the catalog, it will show up when you create your campaign on the Campaign setup page.
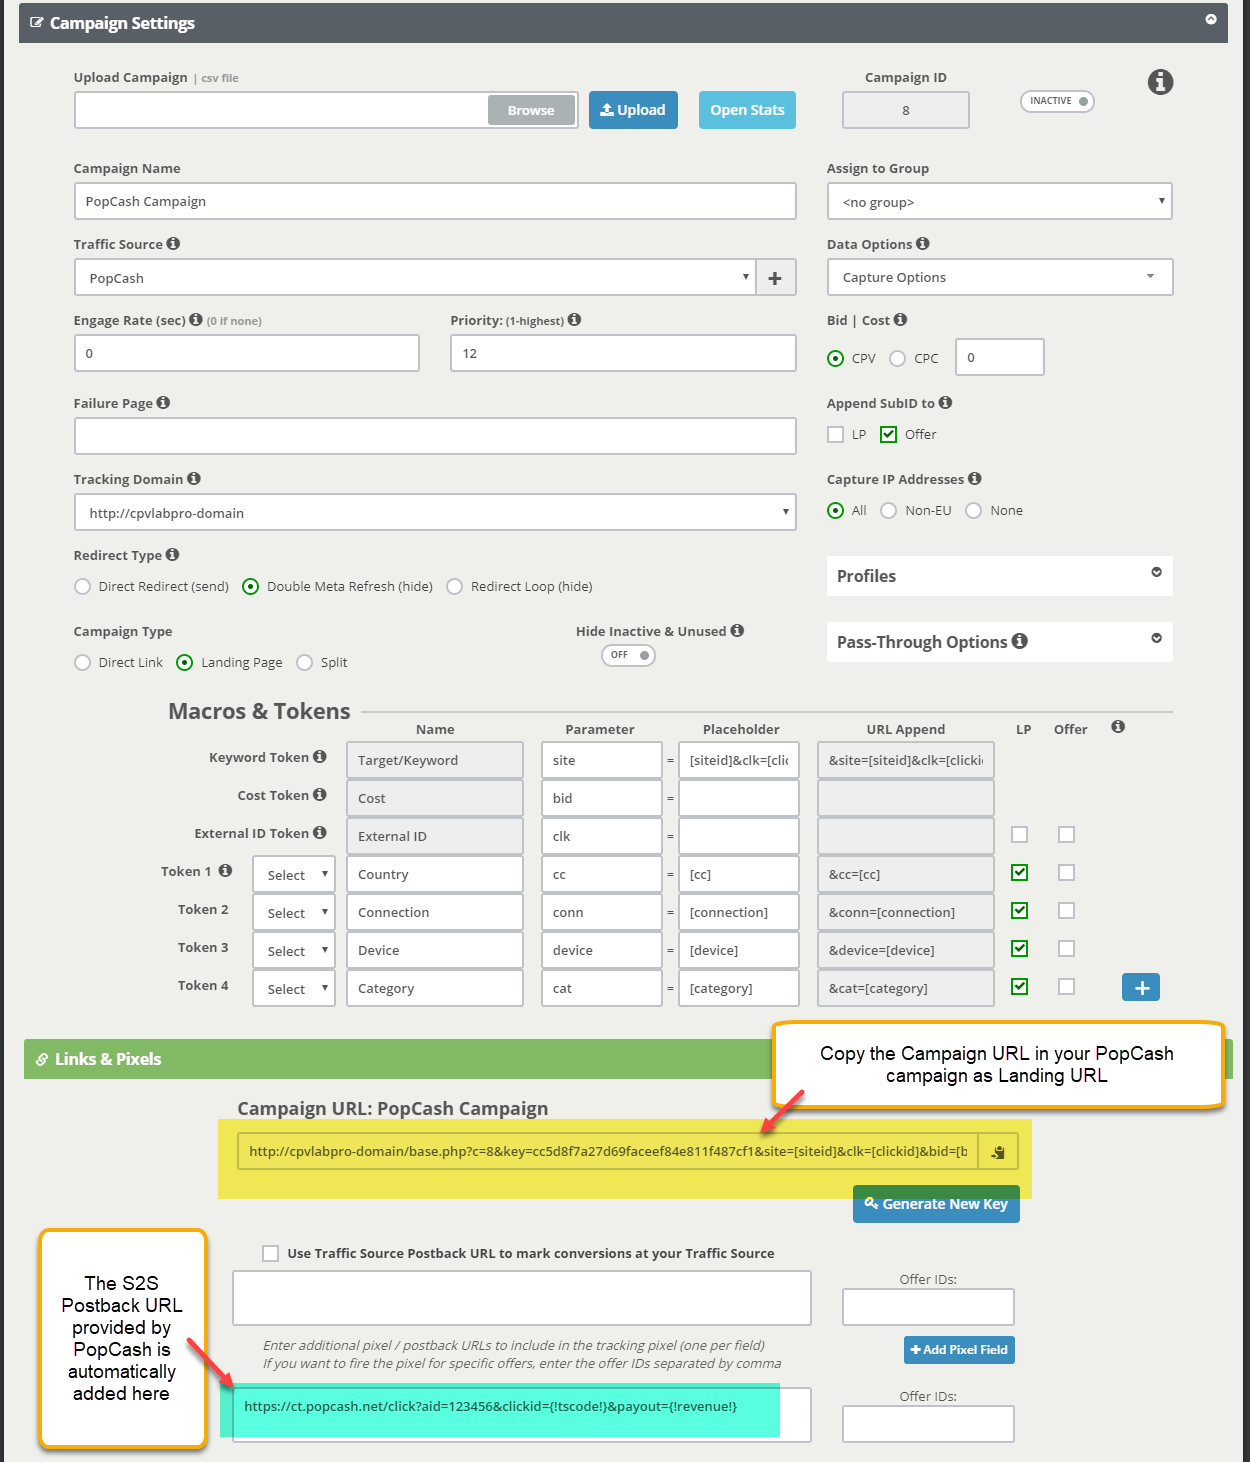
To be able to keep your tracker and your Traffic Source reports in sync, you need to send data back to your traffic source. For that you have to have the Postback URL field setup correctly.
Once you have the Traffic Source setup you can start creating your campaign.
Step 2: Create a Campaign in CPV Lab Pro
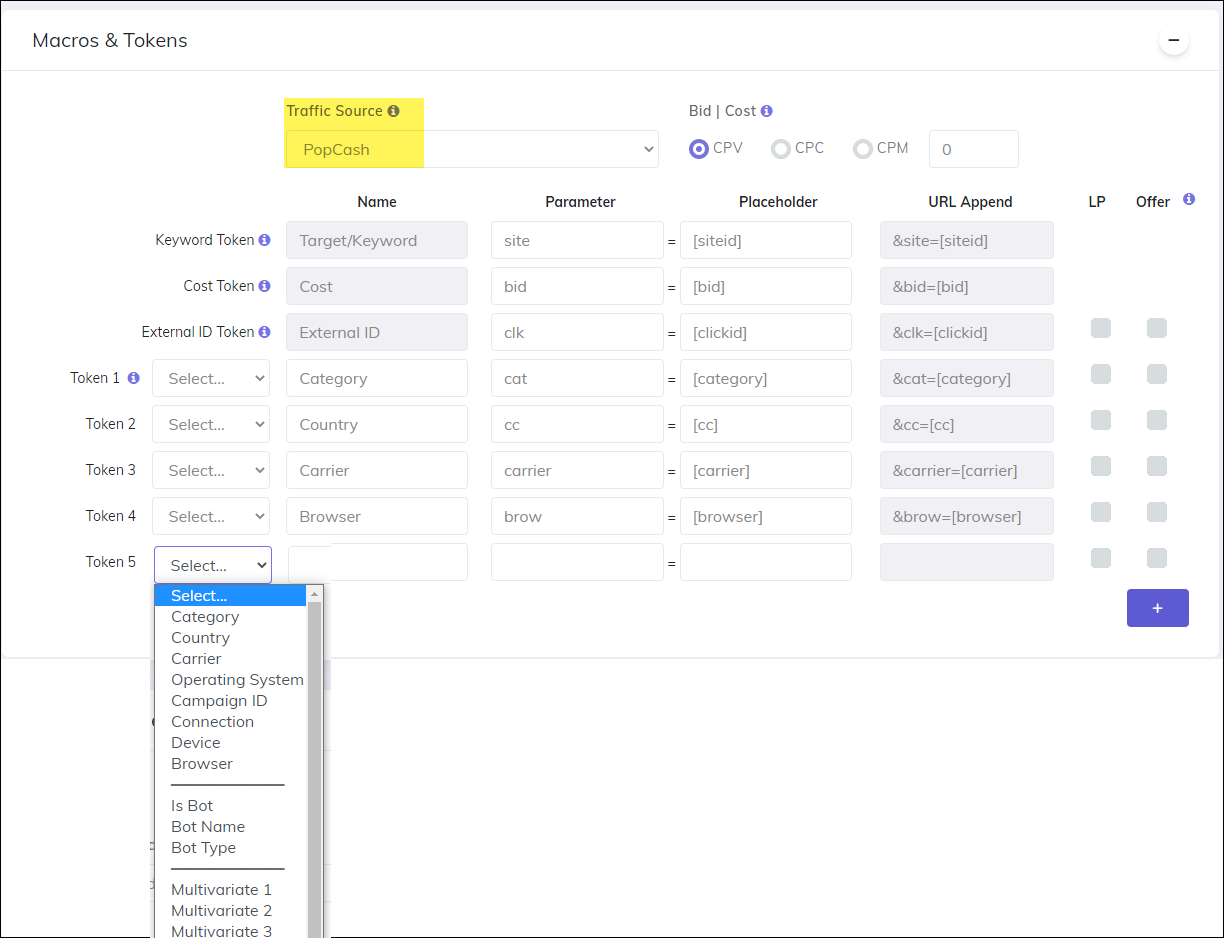
- In your CPV Lab Pro campaign setup page select PopCash as the Traffic Source and choose the Predefined Extra Tokens that you want to capture.
Step 3 (optional): Setup the Postback URL
- In order to track conversions back into the Popcash platform, you need to CHECK the Traffic Source Postback URL in your tracker.
- The Postback URL should contain the CPV Lab Pro macro
{!tscode!}(for Unique Click ID) and{!revenue!}(for conversion amount). - The Traffic Source Postback URL will be automatically filled for the selected Traffic Source in the Campaign setup page, but you need to select/check it in order to have it used (check image below).
- It is located in the "Tracking Pixel" section from your campaign page.
- Make sure it has your corect Popcash ID as parameter!
- The Postback URL should contain the CPV Lab Pro macro
![]()
- The postback URL is in the following format: https://ct.popcash.net/click?aid=123456&clickid={!tscode!}&payout={!revenue!}
You need to change
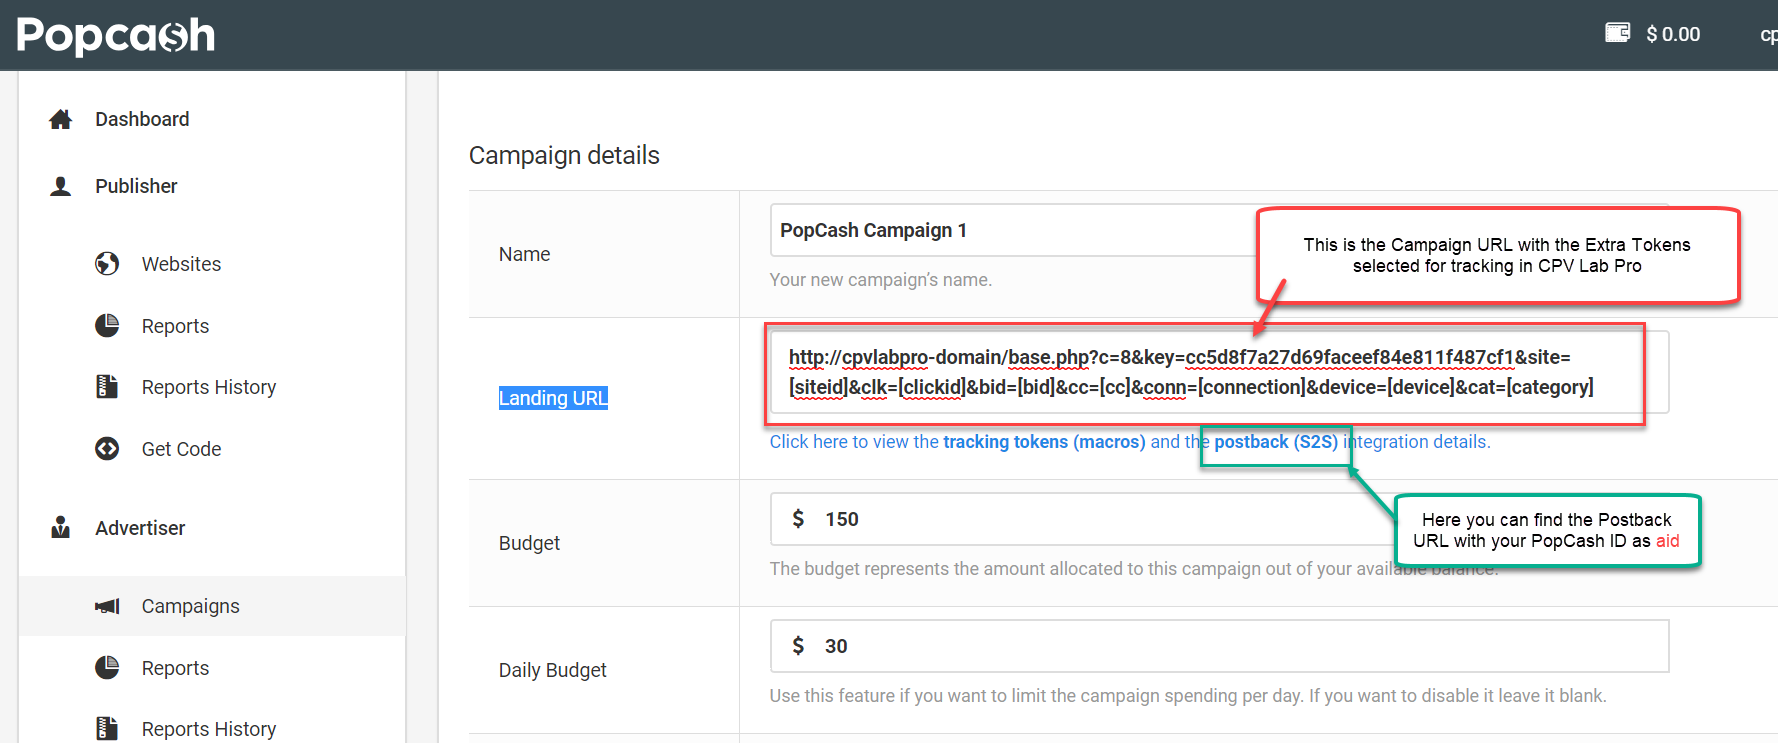
aidto your ID from the postback URL that was created and can be found on the Campaign screen in your PopCash advertiser’s account.
Please note, you need to insert your actual
aid, otherwise your conversions will not be tracked correctly!
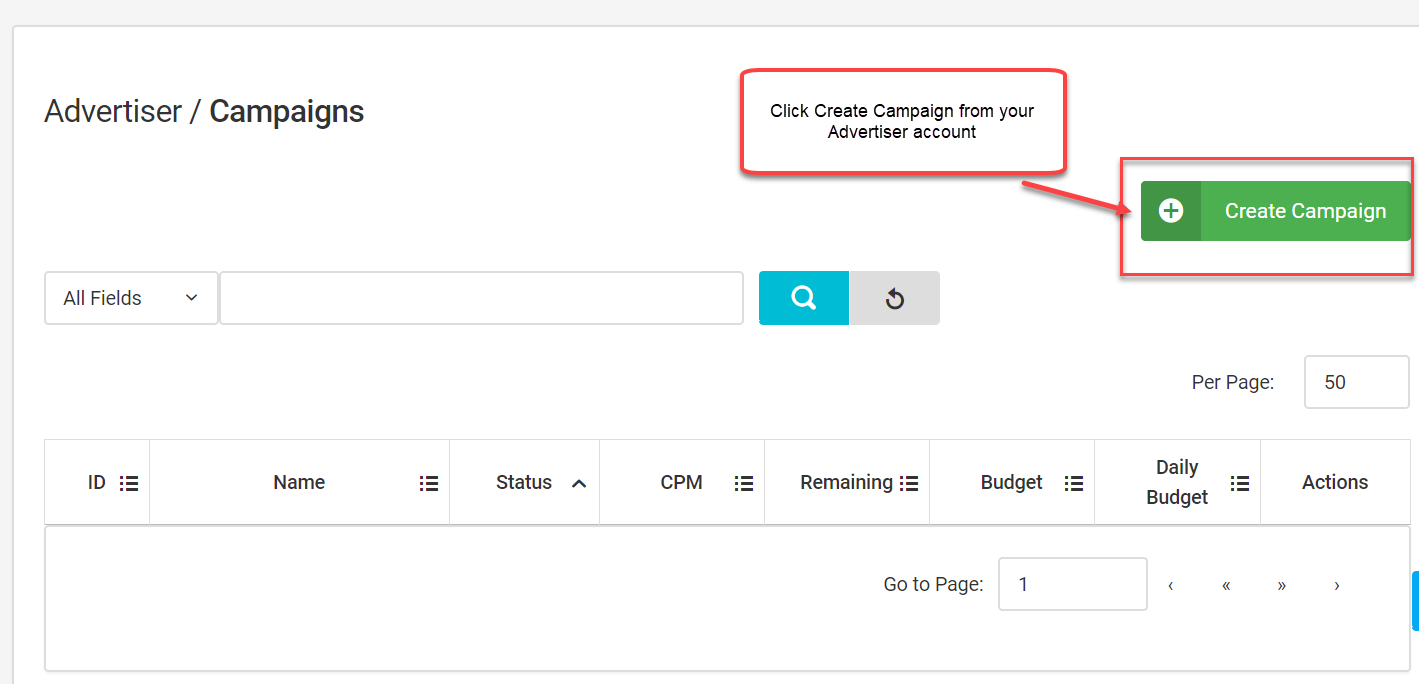
Step 4: Create the campaign in PopCash
- If you don't have a PopCash account yet, first you need to register here (opens new window)!
- After registration you can start creating your campaign (go to Advertiser/Campaigns menu)
- On the Landing URL field you need to put the Campaign URL from CPV Lab Pro
- The Campaign URL (provided in the Links & Pixels section from your Campaign Setup page) has all the parameters you selected as Extra Tokens for this Traffic Source (like in the image below)
- Go to your PopCash account and paste the Campaign URL
- Setup all the other properties for your campaign in PopCash and launch it!