Galaksion integration in CPV Lab Pro
Who is Galaksion?
Galaksion (opens new window) is an advertising network with direct traffic as its main feature. It means they cooperate with trusted website owners and transmit our trffic directly to reliable advertisers — with NO bots and resell. One more benefit of Galaksion is the CPA pricing model (in addition to CPC and CPM). In this case, clients pay only for conversions.
Step 1: Setup Galaksion in CPV Lab
- CPV Lab (opens new window) comes with the Galaksion Traffic Source pre-configured in the Traffic Sources Catalog pages, so in this case all you have to do is import it from the Catalog.

- The detailed configuration for the Galaksion Traffic Source is the following:
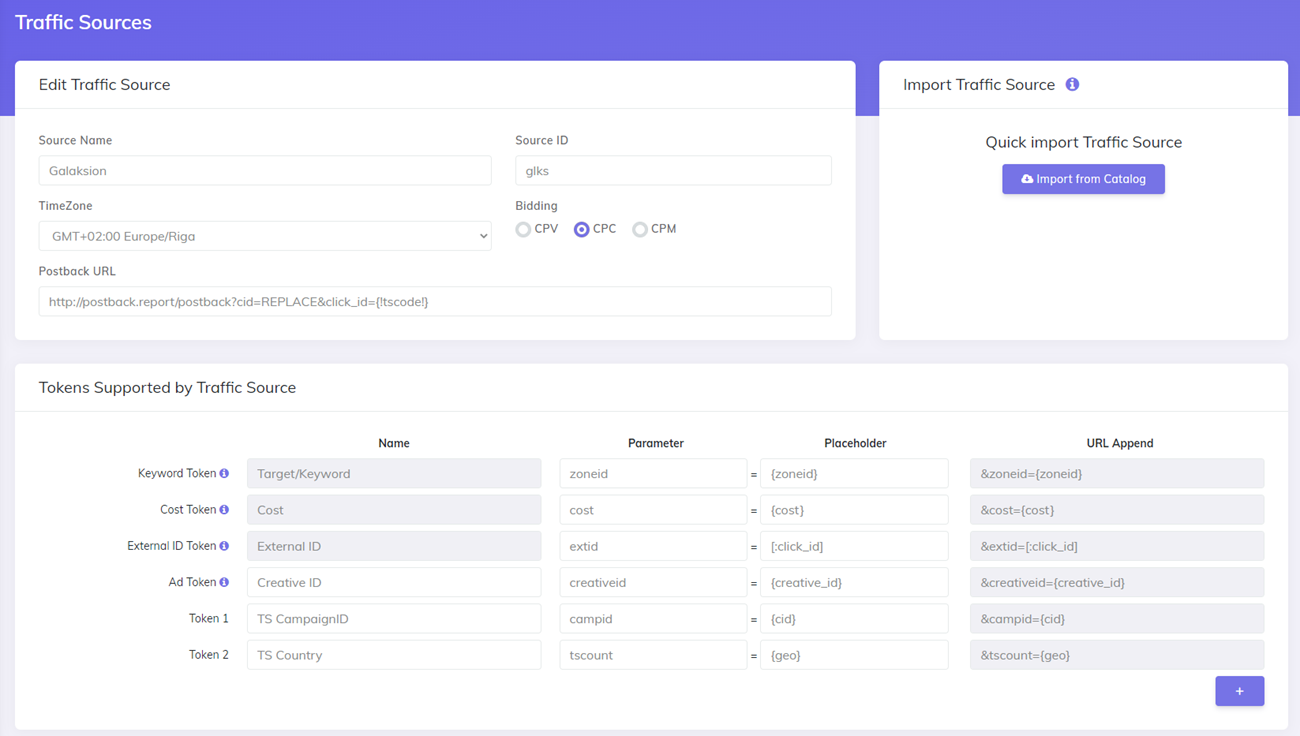
Once you import the traffic source from the catalog, it will show up when you create your campaign on the Campaign setup page and in the quick campaign page.
To be able to keep your tracker and your Traffic Source reports in sync, you need to send data back to your traffic source. For that you have to have the Postback URL field setup correctly.
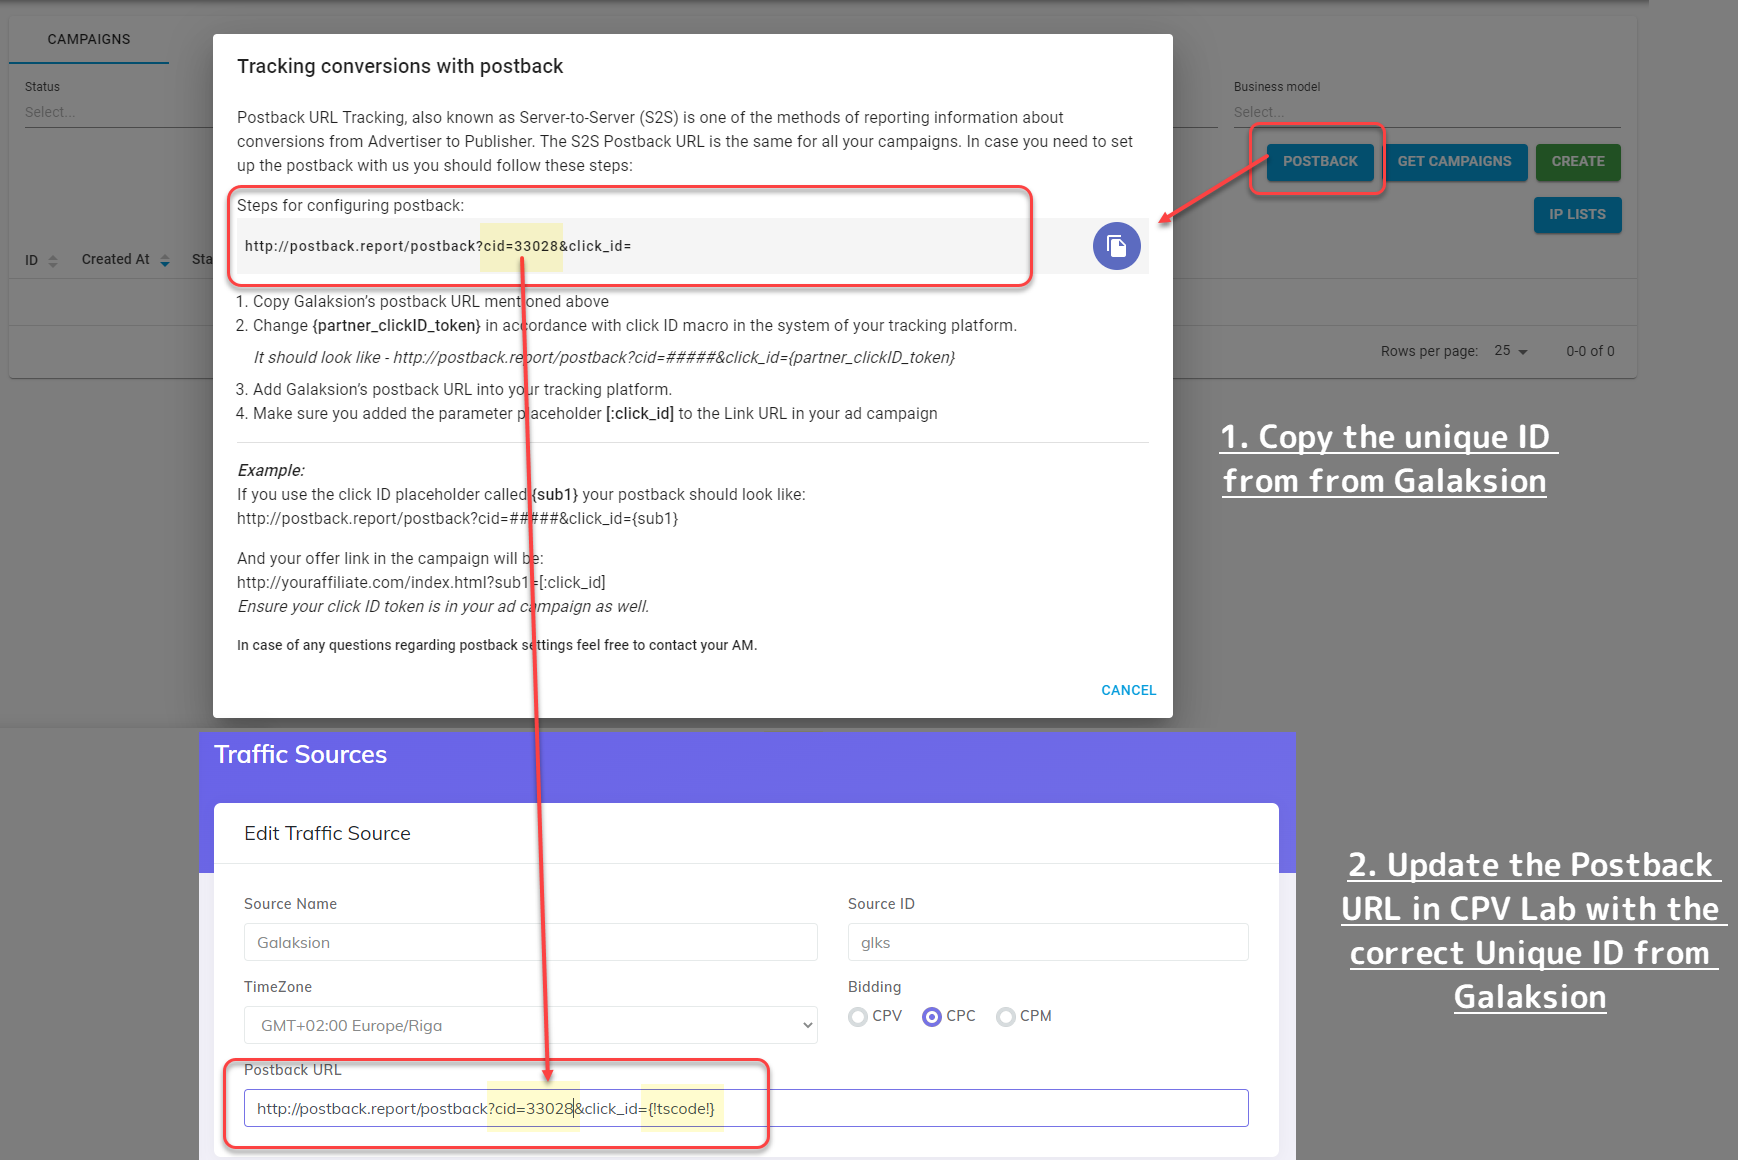
So, update the PostbackURL field with your Unique information from your Galaksion account (check images below for more details).
- first go to your Galaksion account and click on the "Postback" button uder the Campaigns menu
- Copy the Postback URL provided in the popup
- Go back in CPV Lab -> Sources -> Traffic Sources and update the Postback URL for Galaksion traffic source so it will contain your unique identifier (in the image below is an example).
- Make sure the Postback url contains the parameter
click_id={!tscode!}at the end - Save the Traffic Source
Once you have the Traffic Source setup you can start creating your campaign
Step 2: Create a Campaign in CPV Lab
- In your CPV Lab Pro campaign setup page select Galaksion as the Traffic Source and choose the Predefined Extra Tokens that you want to capture.

- Complete the other fields
- Save the campaign
- Optional: check the Traffic Source Postback URL - check the step 5 below for details
Step 3: Create the campaign in Galaksion
- Login to your Galaksion account
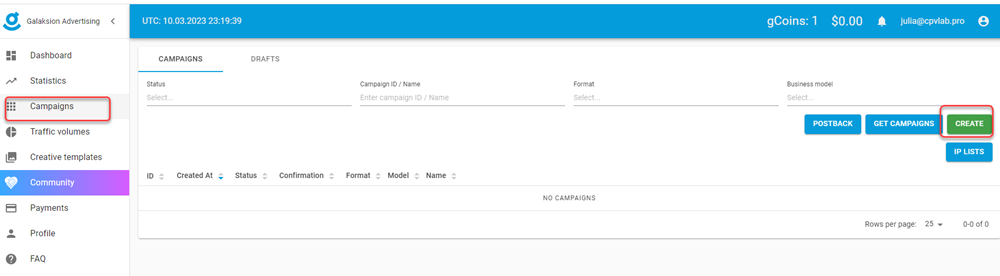
- Create a new campaign by clicking the "Campaigns" menu and then the "Create Campaign" button (
- Complete the Campaign Name
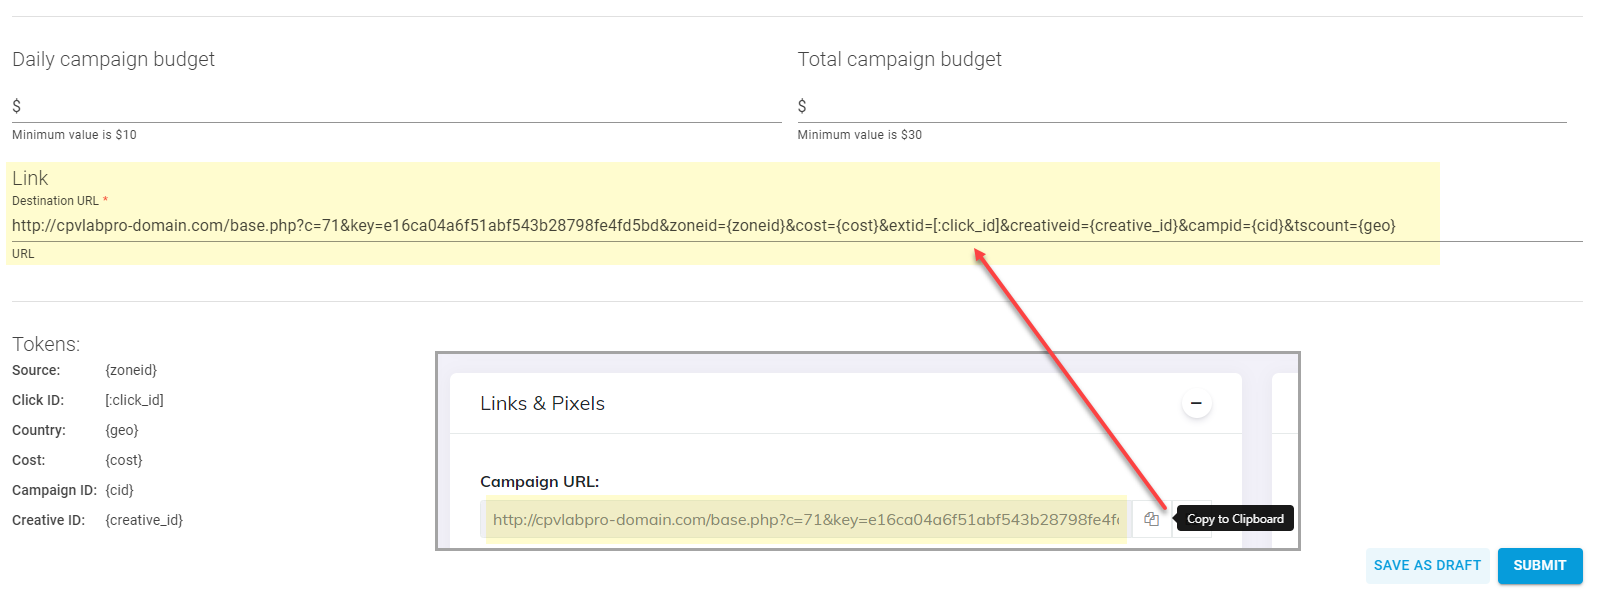
- On the "Link" field copy the Campaign URL from your campaign in CPV Lab Pro (step 2 above) and paste it as a Link URL in Galaksion.
TIP
You can find the campaign URL in the Links & Pixels section of your campaign
- Finish the campaign by filling all the other fields and click "Submit".
Step 4: Start the campaign in Galaksion
- In Galaksion platform, by default, after it is created, the campaign is sent to moderation. Wait until you get the ok to start the campaig

- Start your campaign and follow the results in CPV Lab (opens new window)
Step 5 (optional): Setup the Postback URL
- In order to track conversions back into the Galaksion platform, you need to CHECK the Traffic Source Postback URL in your tracker.
- The Postback URL should contain the CPV Lab Pro macro
{!tscode!}(for Unique Click ID). - The Traffic Source Postback URL will be automatically filled for the selected Traffic Source in the Campaign setup page, but you need to select/check it in order to have it used (check image below).
- It is located in the "Tracking Pixel" section from your campaign page.
- Make sure it has your Galaksion ID (check step 1 above for details)!
- The Postback URL should contain the CPV Lab Pro macro
![]()
- The postback URL is in the following format:
http://postback.report/postback?cid=REPLACE-WITH-YOUR-ID&click_id={!tscode!}
- The
cidparameter is your unique ID from Galaksion and theclick_idis the unique visitor id to be tracked in CPV Lab.
Find more details in the video below:
Video Tutorial for setting up your CPV Lab tracking with a Galaksion campaign (opens new window)