PushHouse integration in CPV Lab
Who is PushHouse?
Push House (opens new window) is an advertising network that cares about your profit and high ROI! Offers a comprehensive range of features and services designed to empower advertisers in maximizing their campaign performance. Aside from the Classic Push format, Push.House provides another ad format worth exploring: In-Page Push!
Join Push.House and get a 10% top-up bonus on your first deposit from $50. Promo Code: CPVLab-Push
General requirements
There are a few general rules to follow to ensure that your tracker is setup correctly to track your campaigns. These are valid for all campaign types:
- Define the traffic source
- Define the affiliate network (optional)
- Define your landing pages and offers
- Create the campaign in the tracker
- Create the campaign at the traffic source
- Setup Postback URL
- Test
Step 1: Choosing CPV Lab as a default tracker
- Go to your PushHouse account and go to the "Tracking" section
- You will discover comprehensive details regarding the S2S Postback URL. To access the specific information about your S2S Postback URL, simply select CPV Lab from the available options.
- You will receive the exact Postback URL you need to use in CPV Lab
- This URL will be used by the tracker to send information about conversions back to the traffic source.
![]()
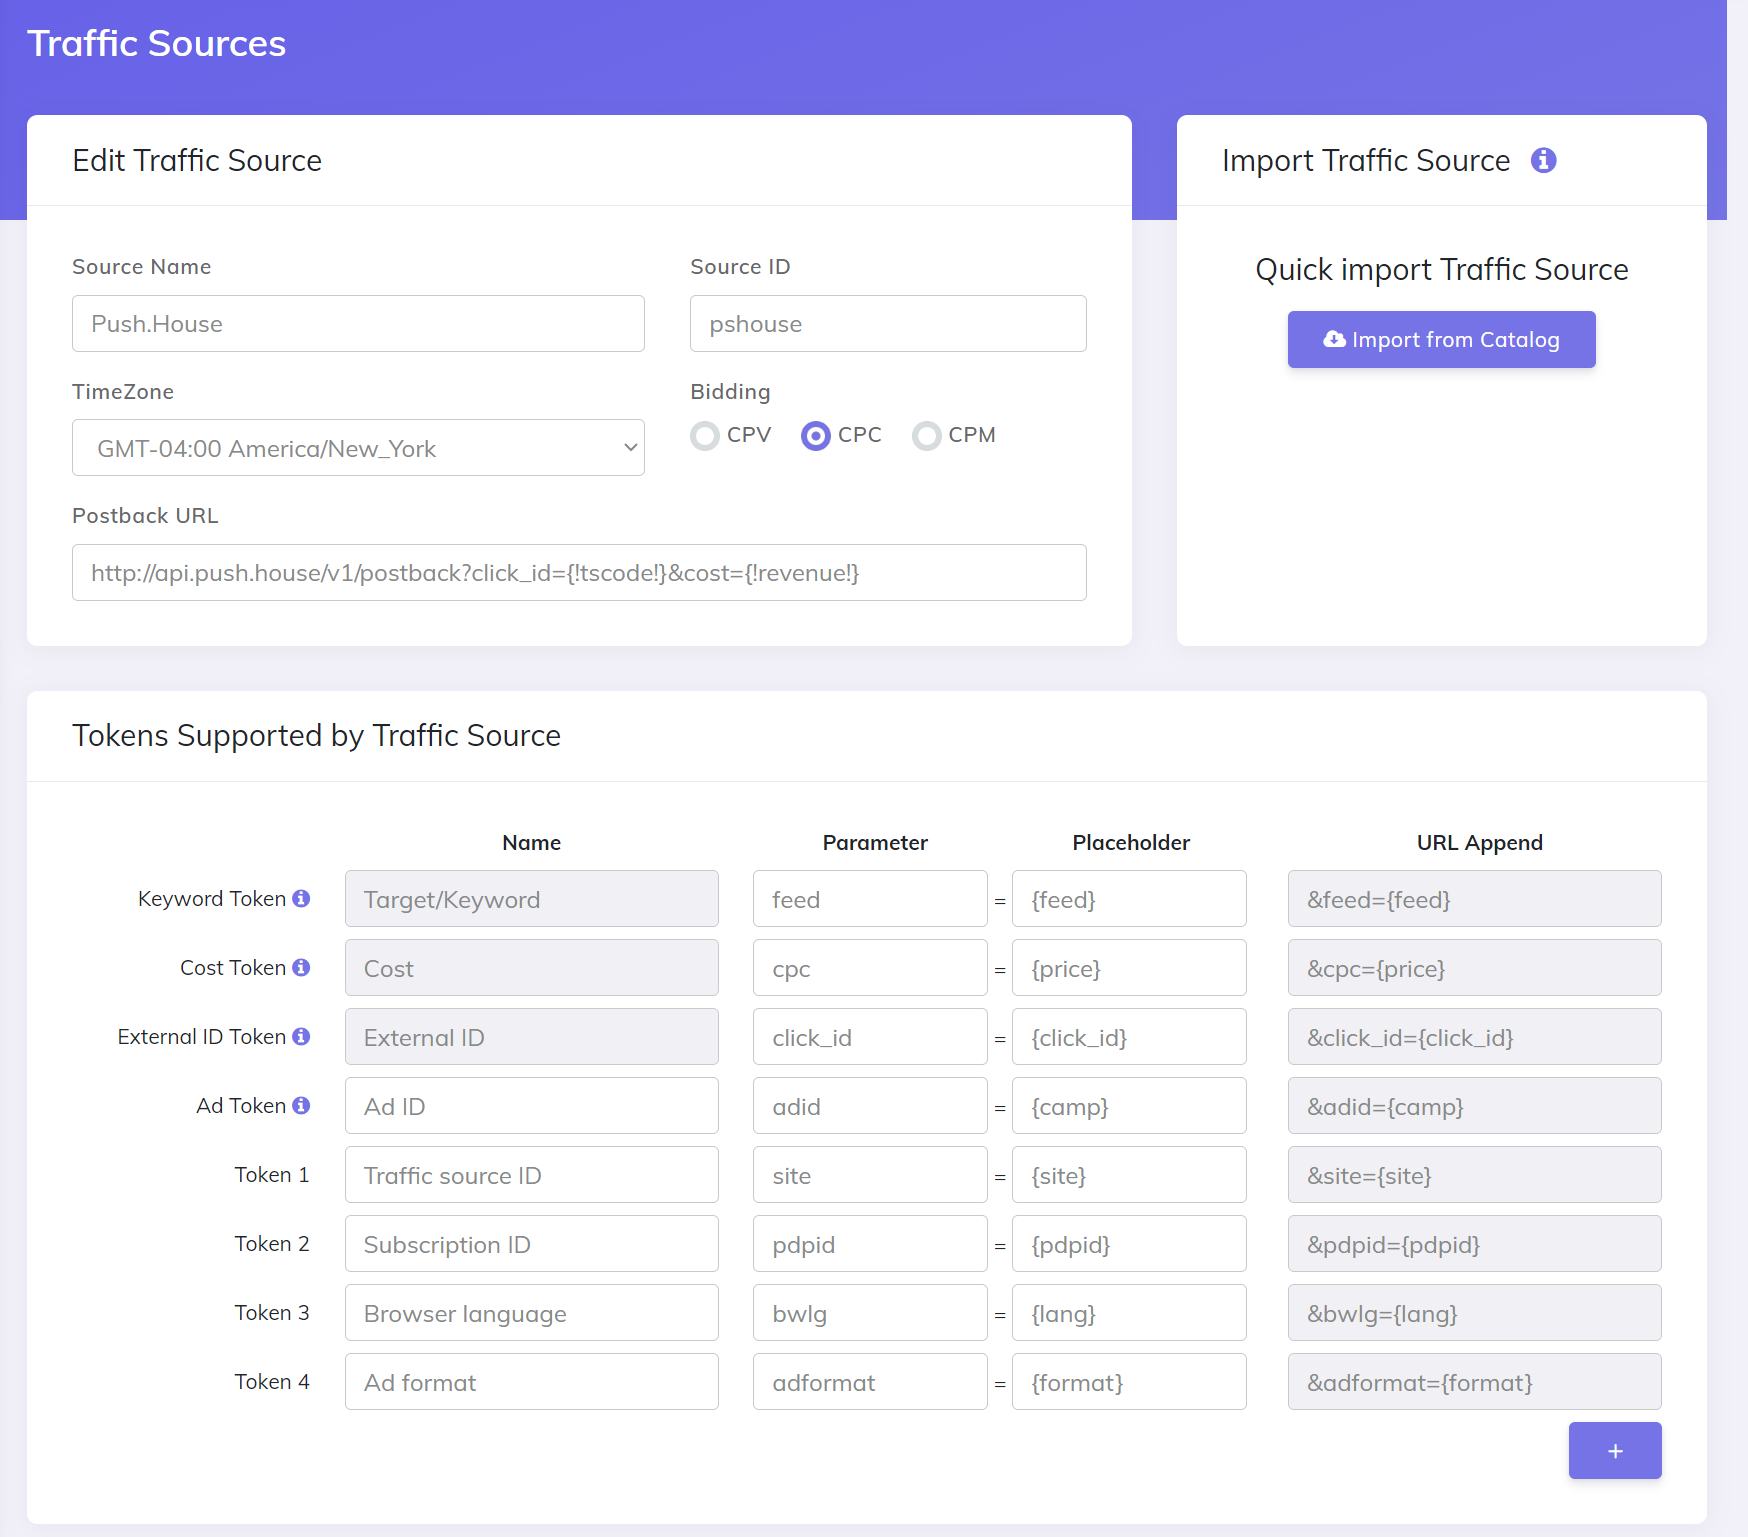
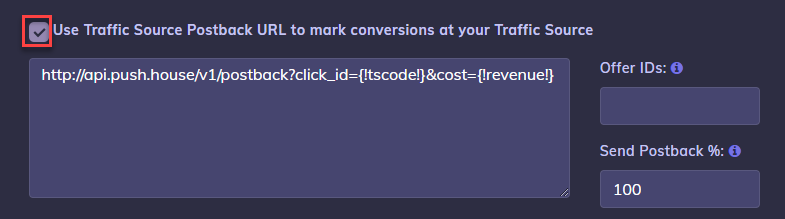
- For Push House, the Postback URL has the following format:
http://api.push.house/v1/postback?click_id={!tscode!}&cost={!revenue!}
Step 2: Add Push.House as a traffic source in CPVLab
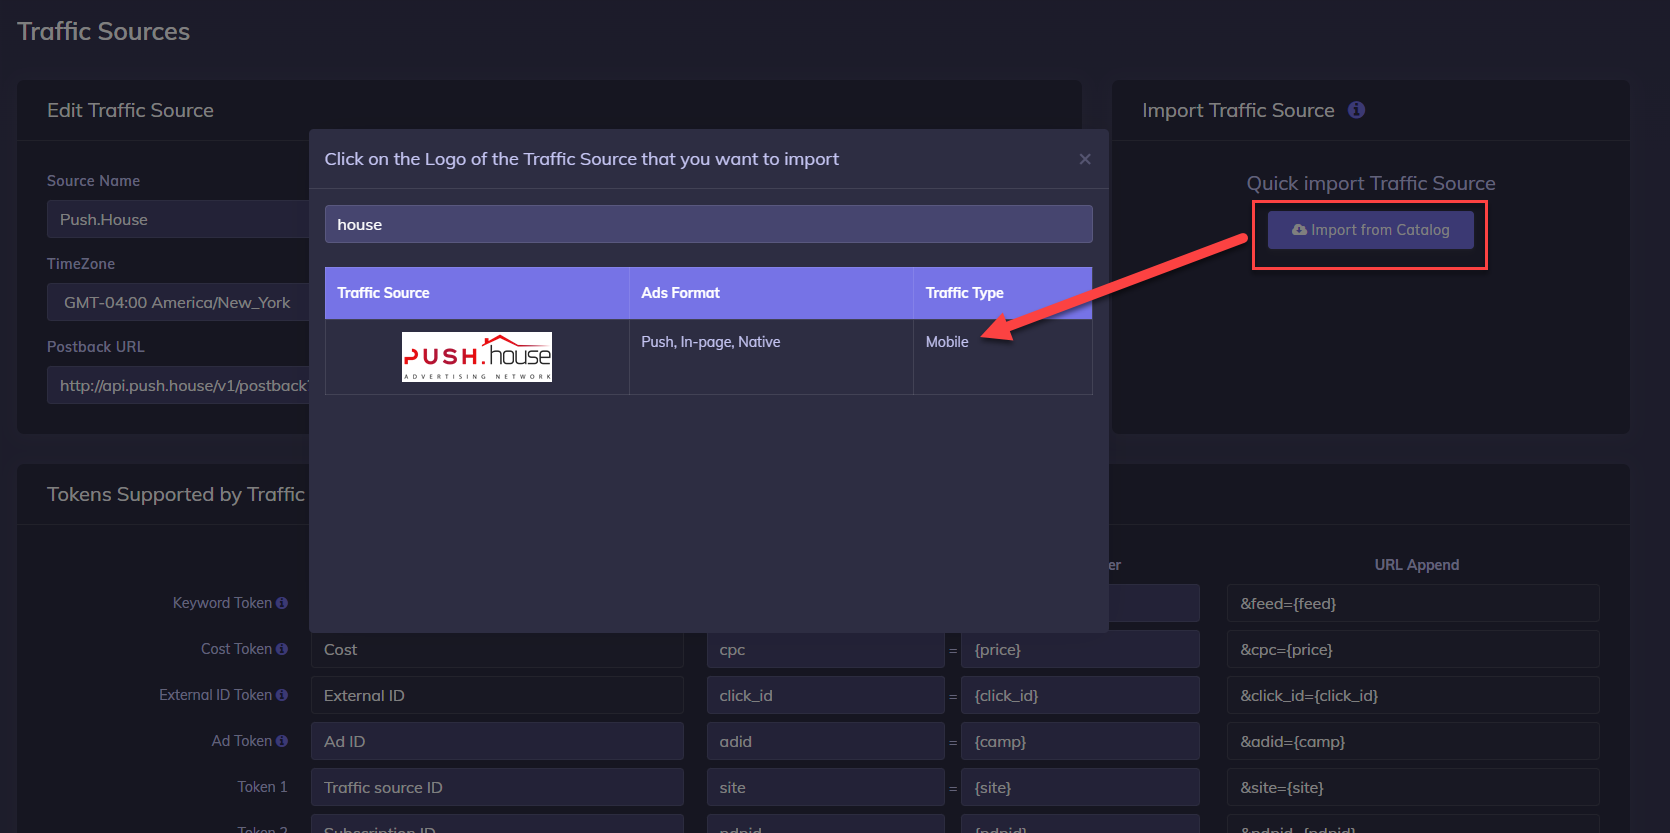
CPV Lab comes with the PushHouse Traffic Source pre-configured in the Traffic Sources Catalog pages, so in this case all you have to do is import it from the Catalog.
- Access your CPV Lab account
- Navigate to the "Sources" tab and locate the option for "Traffic Sources"
- Click on the "Import from Catalog" button
- Select Push.House
- CPV Lab will pre-populate all the traffic source settings.
- Make sure the Postback URL has same parameters as the one provided at Step 1 above
- The detailed configuration for the Push House Traffic Source is the following:
Once you import the traffic source from the catalog, it will show up when you create your campaign on the Campaign setup page.
Once you have the Traffic Source setup you can start creating your campaign
Step 3: Add an Offer Source to CPV Lab (optional)
TIP
If you are not utilizing an Offer from an Affiliate platform, please proceed to Step 4.
- To integrate an Affiliate network, navigate to the "Sources" section and select "Offer Sources." - - Go to the "Import from catalog" feature where you will discover a selection of Affiliate networks available for integration.
- If your specific Affiliate network is not listed, you have the option to manually define the parameters required by the affiliate platform you are using and save it
More info about Affiliate Networks (opens new window)
Step 4: Adding Landing Page & Offer URLs to Campaigns
Before creating a campaign you need to make sure you have your landing pages and offers defined. Once you define your landing pages and offers, you can then use them for your campaigns.
- To add Landing pages go to: LPs&Offers -> LPs Management menu
- To add new offers go to: LPs&Offers -> Offer Management menu
Step 5: Set up your campaign in CPV Lab
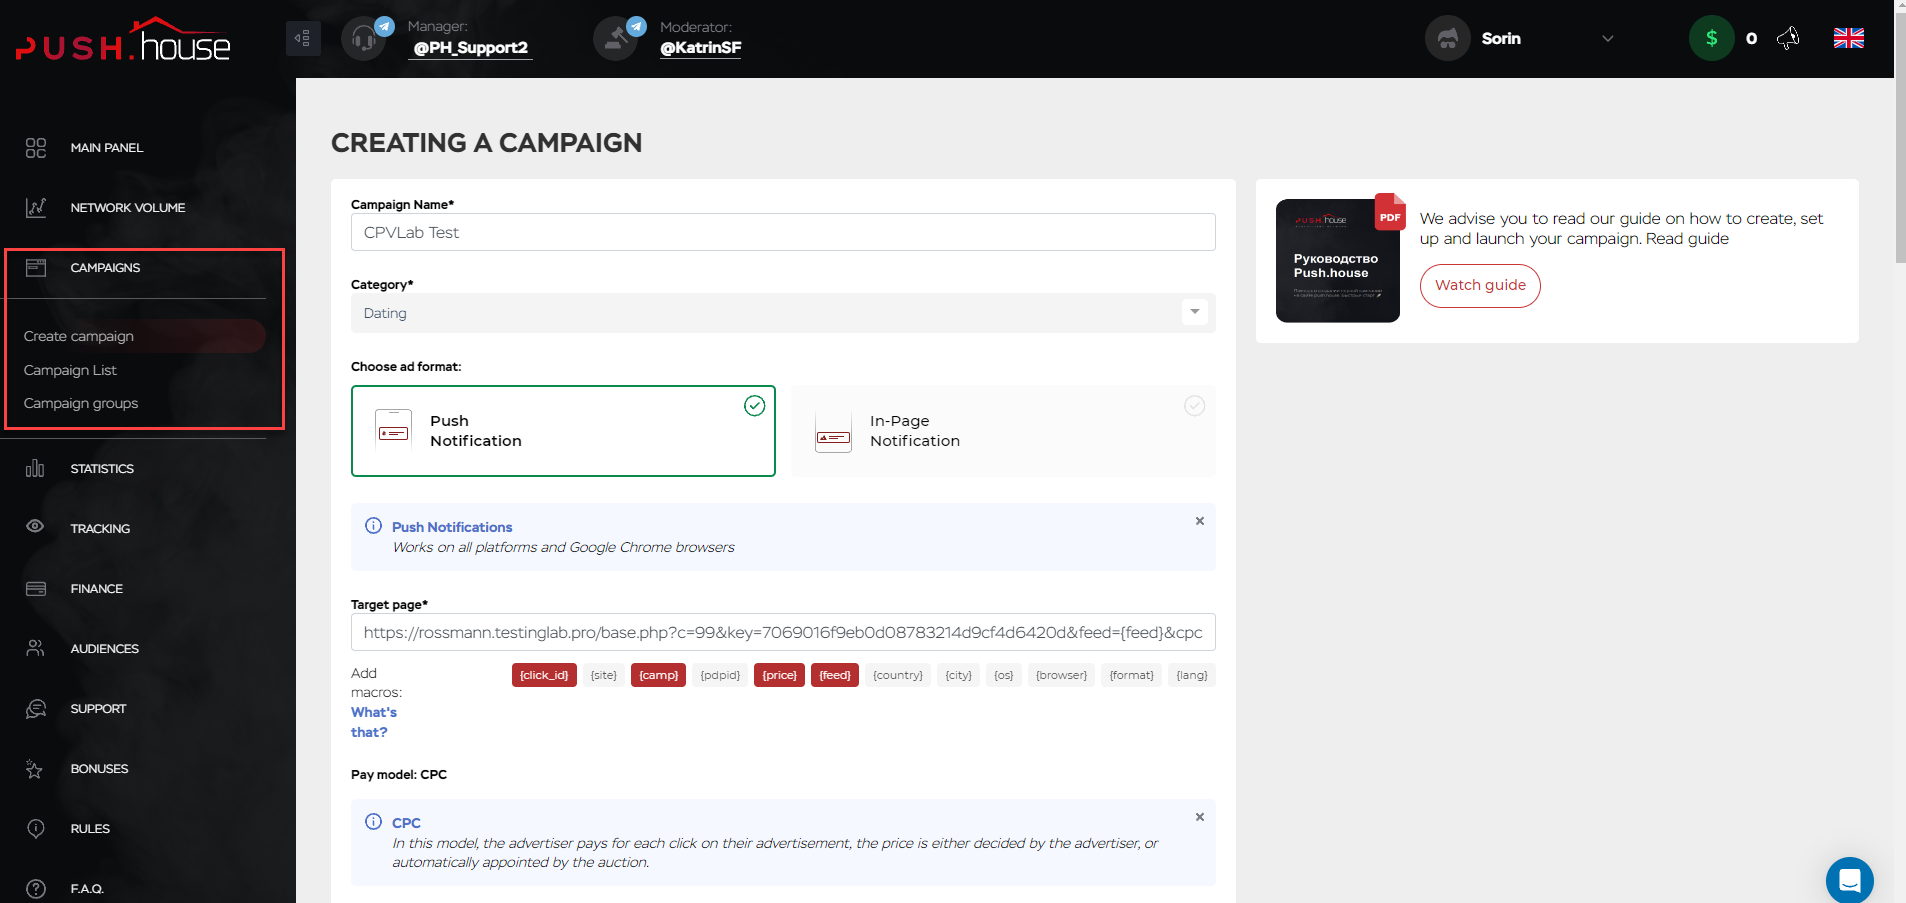
- To start your campaign, click on the top blue button that says: "New Campaign".
- You will encounter a menu providing options for creating a campaign based on your preferences.
- Alternatively, you can navigate to the Campaigns List and select your desired campaign from there and edit or clone one of them.

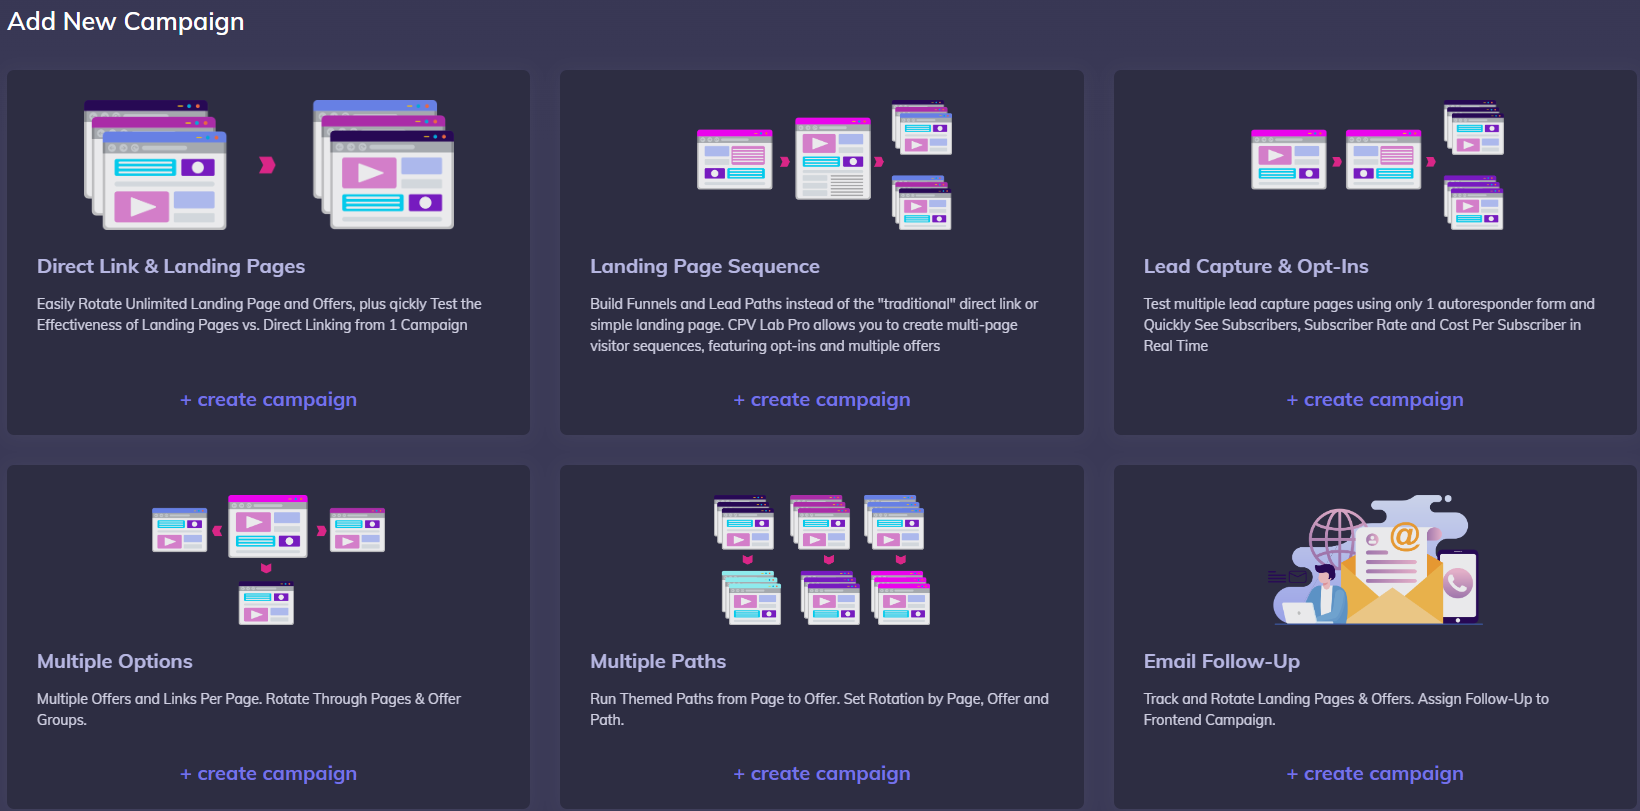
- In this tutorial, we will be employing a "Direct Link & Landing Page" configuration. Begin by assigning a "Name" to the campaign, and then proceed to scroll down to the section labeled "Macros & Tokens."
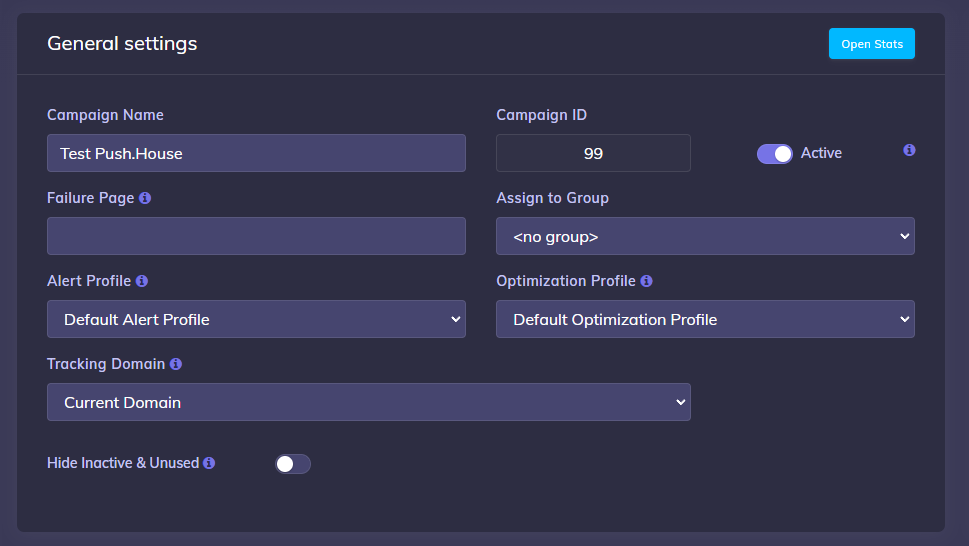
- Choose Push House as the designated Traffic Source for this campaign.
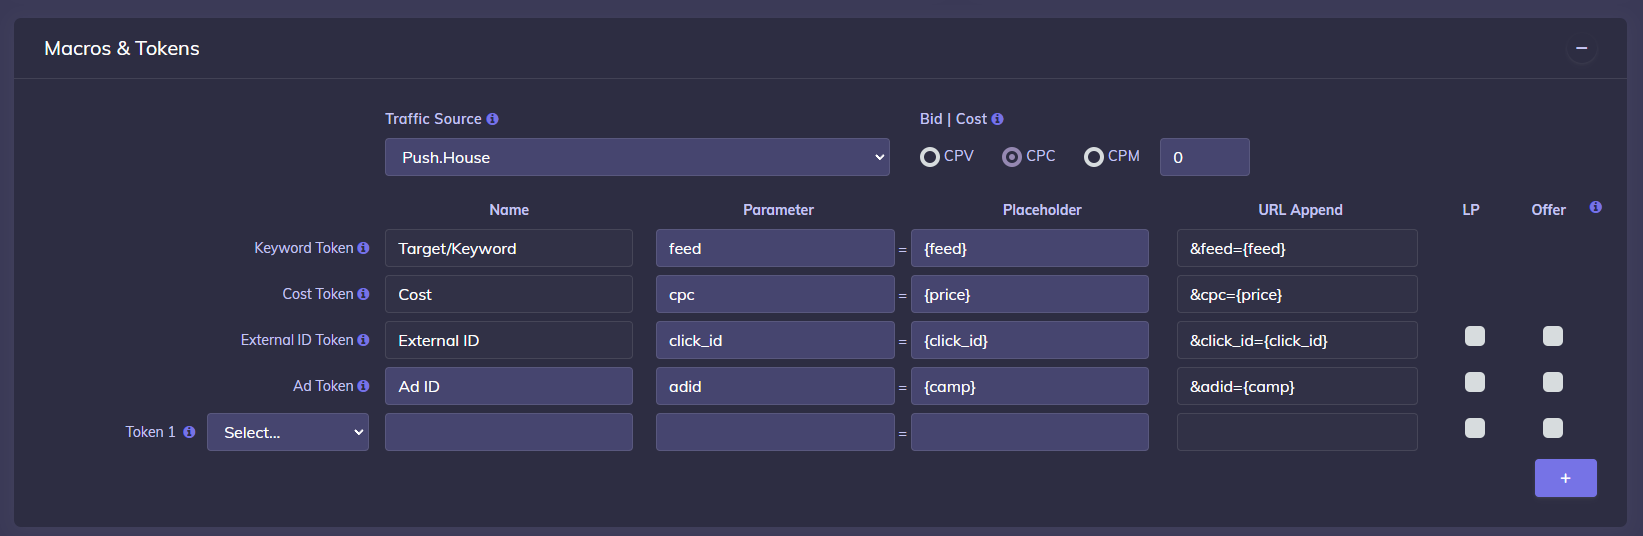
Keep scrolling down the page. If you use a Landing Page, you can input it at this stage.
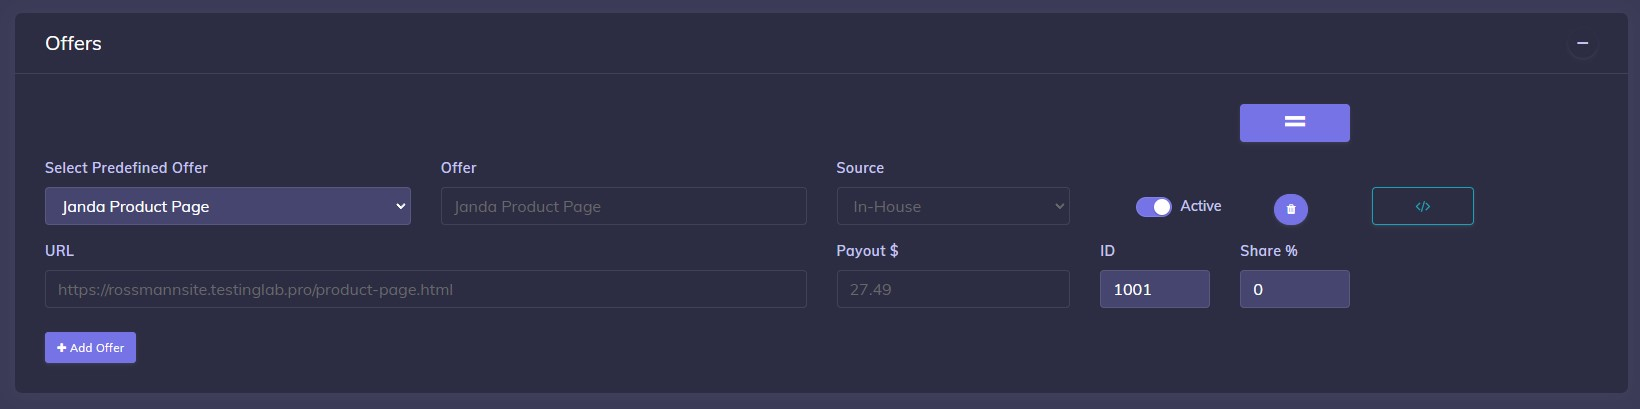
Under the "Offers" section, click on "Select Predefined Offer" and choose the Offer you previously created at Step 3 above. The remaining parameters will be automatically populated based on the settings defined for the selected Offer.
- Finally, in the "Tracking Pixels" section, tick the option "Use Traffic Source Postback URL to mark conversions at your Traffic Source." This will ensure that conversions are sent back to Pushhouse.
- Save the Campaign. You should now get a Campaign URL similar to the following:
TIP
Please take note that the tracking domain used in CPV Lab may vary based on your campaign settings. However, the campaign URL should resemble the example provided above. You will utilize this URL when configuring your campaign in PushHouse.
Step 6: Set up the campaign in Push.House
- Login to your Push.House account
- Create a new campaign by selecting the "Campaigns" menu
- Then click on “Create Campaign”
- Choose the advertising format: Push / In-Page
- On the Target page field, copy the Campaign URL from your campaign in CPV Lab (step 4 above) and paste it as a Landing URL in Push.House ( this is your tracking link )

- Complete all the other fields and save
Step 7 (optional): Test conversion tracking in Push House
- Push.House also provides a feature to facilitate the testing of conversion tracking. This feature allows you to verify the functionality and accuracy of your conversion tracking setup.
