ReklamStore DSP integration in CPV Lab Pro
Step 1: Define a new Traffic Source for ReklamStore DSP
CPV Lab Pro comes with the ReklamStore DSP (opens new window) Traffic Source pre-configured in the Traffic Sources Catalog, so in this case you just have to import it from the catalog and follow with Step 2.
If you have an older install of CPV Lab Pro that doesn’t have the pre-configured ReklamStore DSP Traffic Source, then you can download the following XML file and import it in the Traffic Sources page:

This will import the ReklamStore DSP Traffic Source and you will see it available in the Traffic Sources page from CPV Lab Pro.
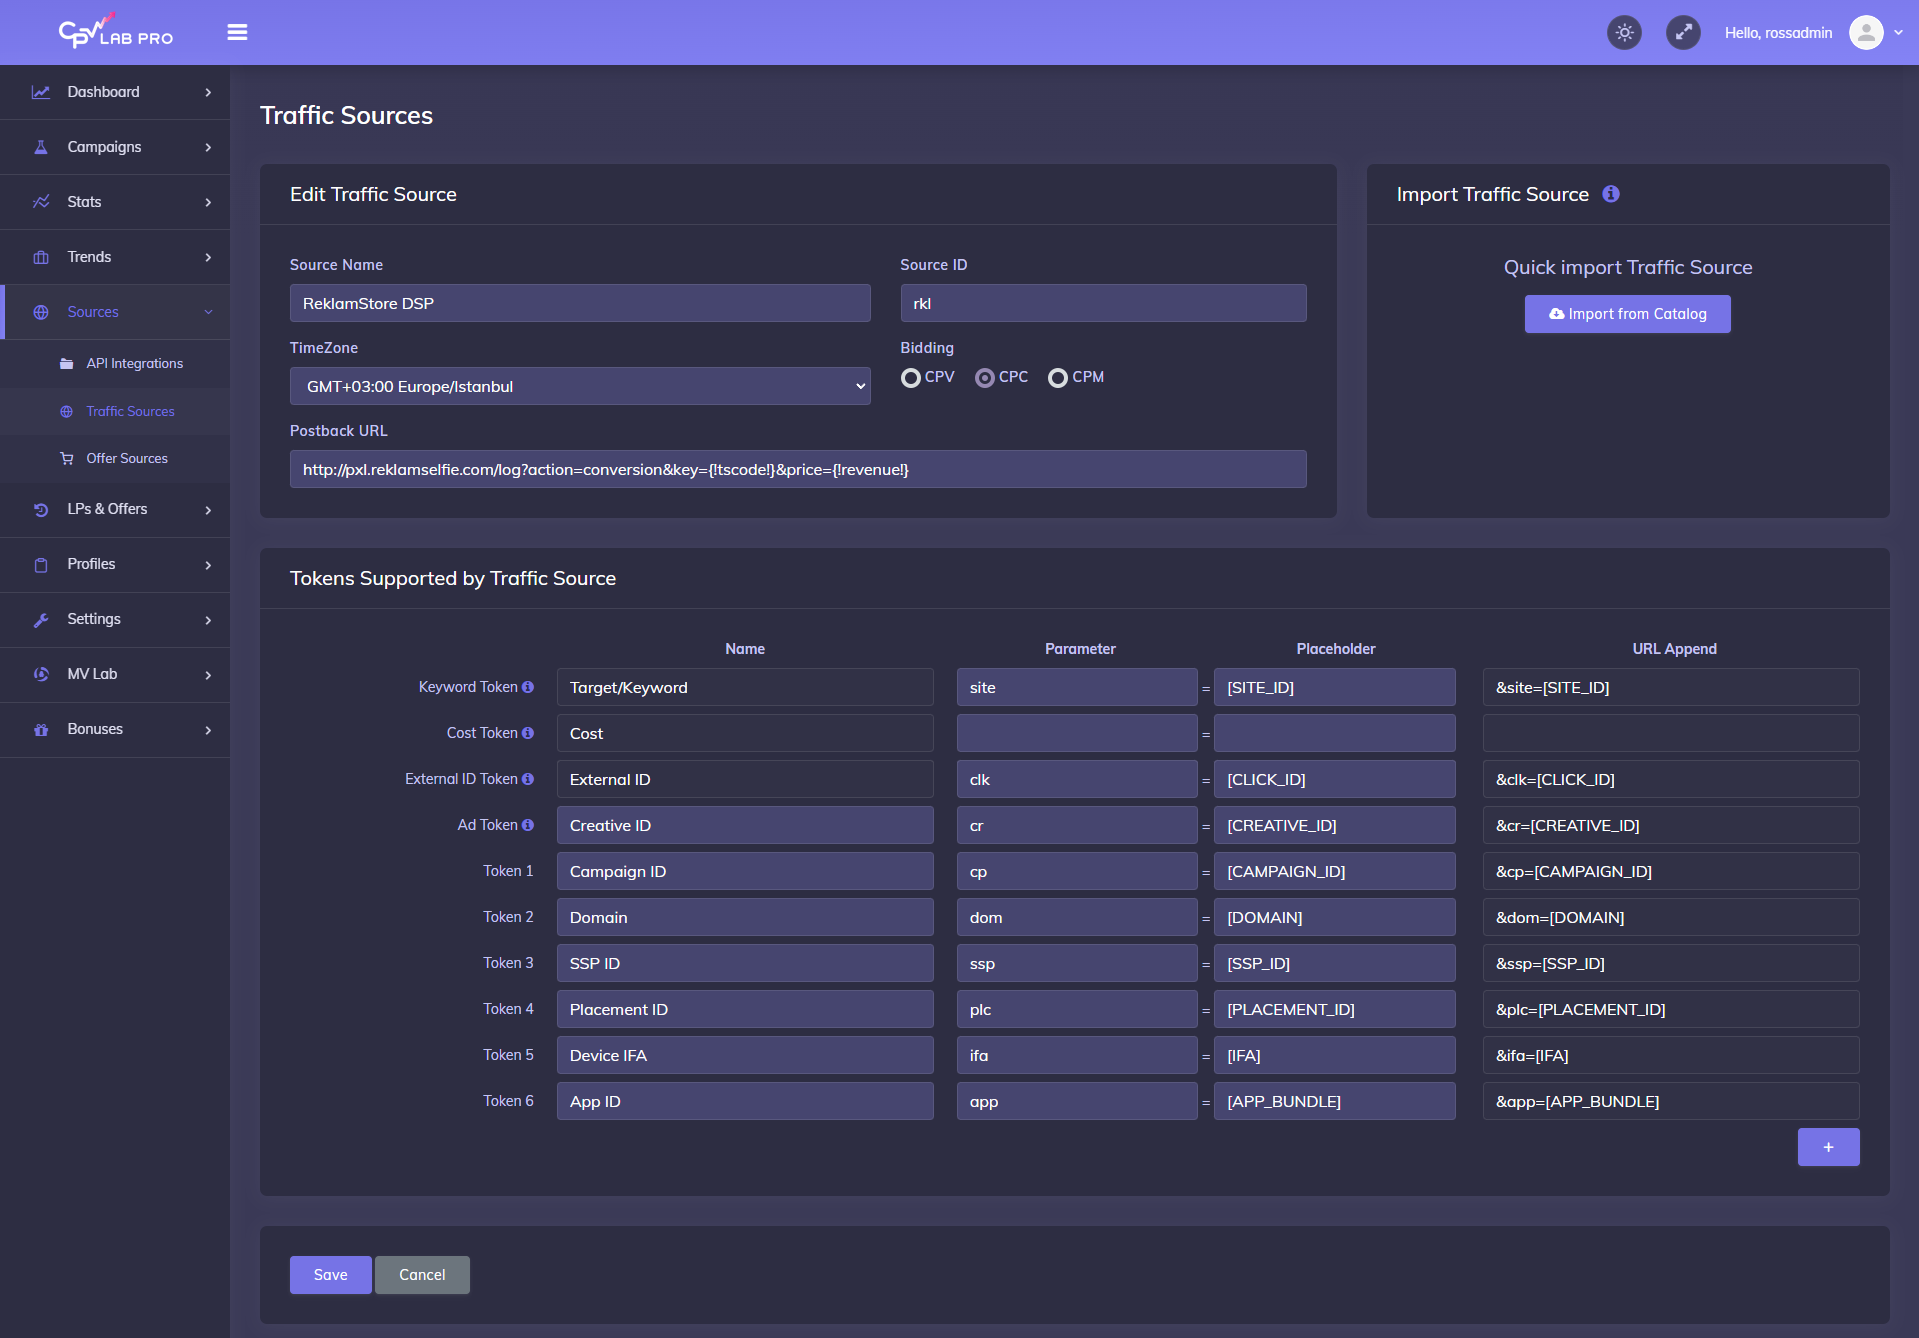
The detailed configuration for the ReklamStore DSP Traffic Source is the following:
Step 2: Create a Campaign
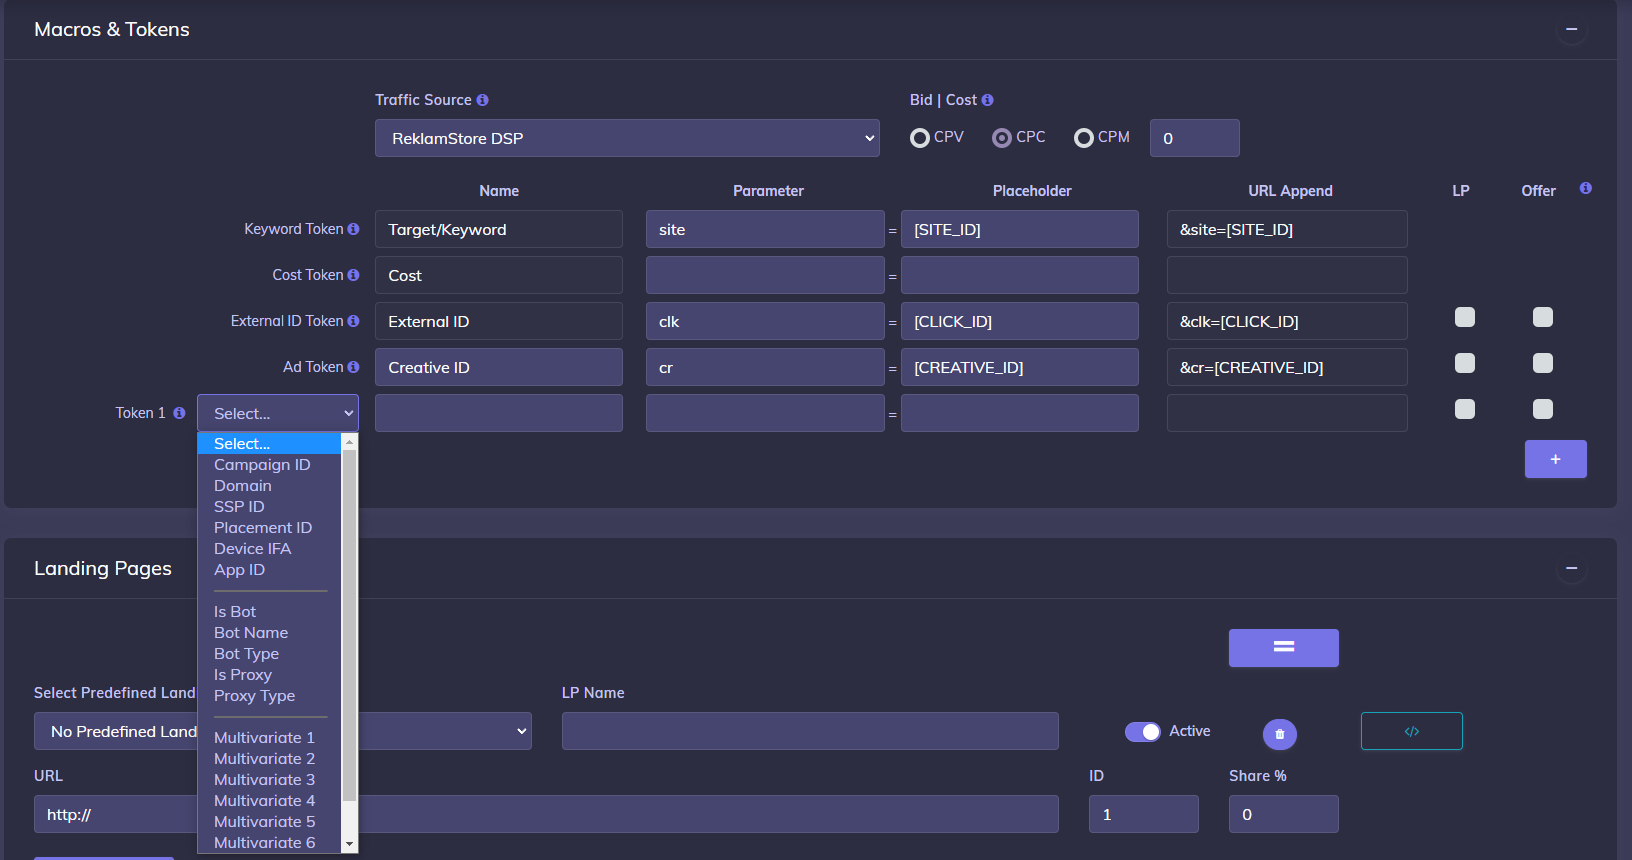
- In your CPV Lab Pro campaign setup page select ReklamStore DSP as the Traffic Source and choose the Predefined Extra Tokens that you want to capture.
- You will define an average CPC for your campaign and you can later adjust it as needed or define Exact CPC for Target/Ads.
Step 3 (optional): Setup the Postback URL
- In order to track conversions into the ReklamStore DSP platform, you need to setup the Global Postback URL from ReklamStore DSP as the Additional Pixel in the Campaign setup page from CPV Lab Pro.
- The Global Postback URL should contain the CPV Lab Pro macros
{!tscode!}(for Unique Click ID) and{!revenue!}(for conversion amount). - Enter the following Postback URL as additional pixel in the Campaign Setup page from CPV Lab Pro:
http://pxl.reklamselfie.com/log?action=conversion&key={!tscode!}&price={!revenue!}
Step 4: Create the campaign in ReklamStore DSP platform
If you don't have an account on ReklamStore DSP, then you can click here (opens new window) to create an account.
- CPV Lab Pro users can take advantage of an Exclusive Deal that offers 25% Bonus on the first Deposit by using the CPVLP25 Coupon Code when depositing your account.
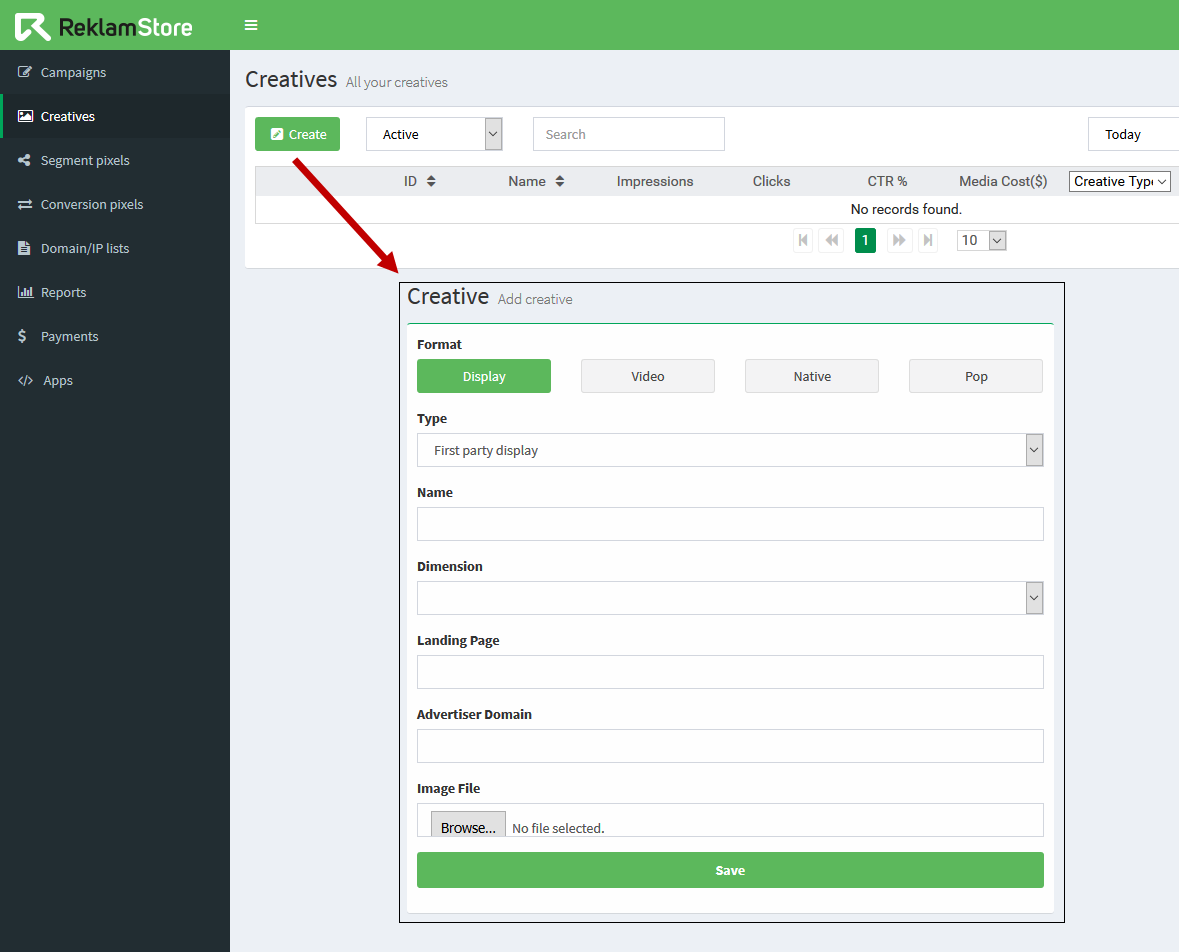
First you will setup your Creatives in the dedicated Creatives page from ReklamStore DSP.
- Next you will create your Campaign and select the desired Creatives from the ones defined earlier.
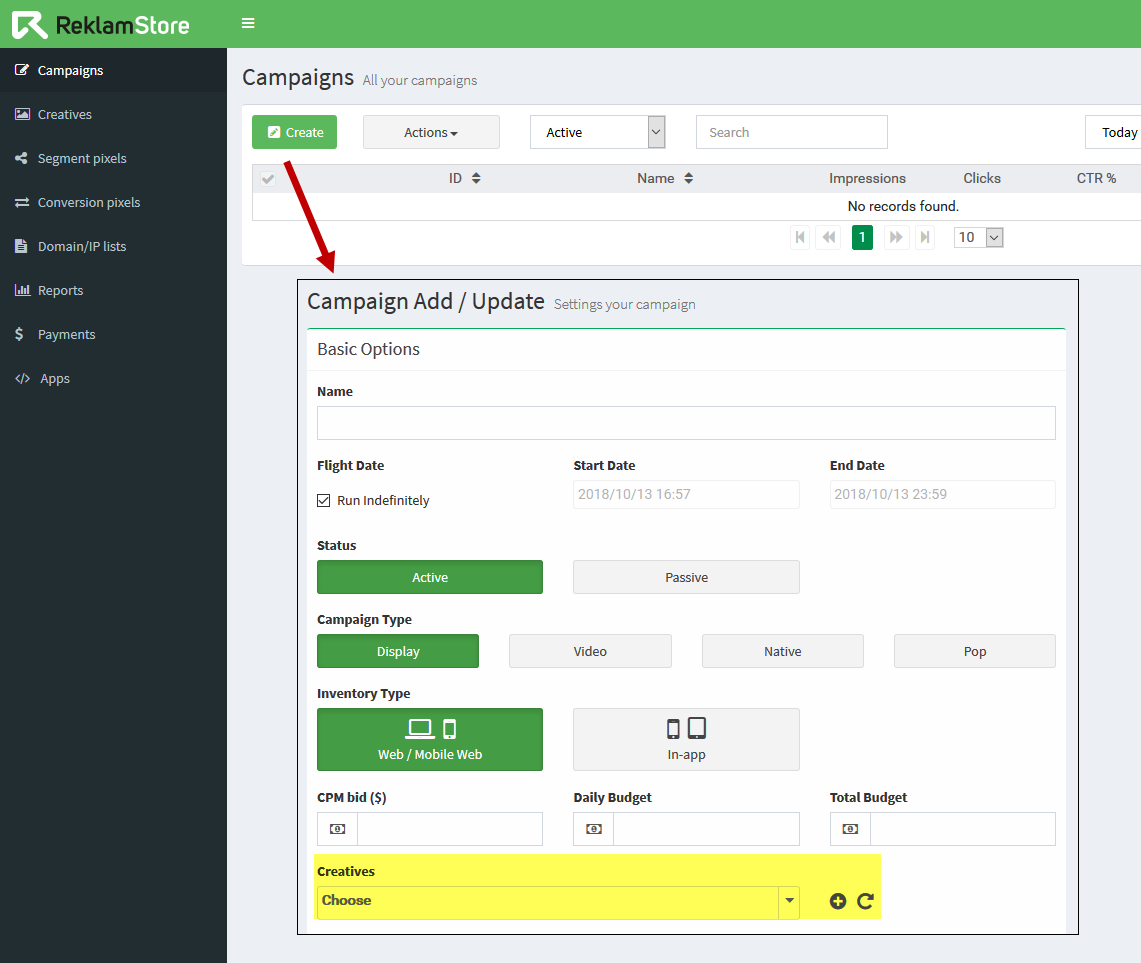
- ReklamStore DSP (opens new window) offers many Targeting Options that will allow you to configure your traffic as you wish.